Mechanical seal identification becomes faster when a supplier receives an organized information package. Instead of sending one blurry photo or only a shaft diameter, provide the pump nameplate, clear views of the removed seal, key dimensions, markings, and basic operating data. The goal is not to identify the seal yourself. The goal is to give the supplier enough evidence to confirm the correct replacement with less uncertainty.
For buyers and maintenance technicians, a useful request should answer four questions: Which pump is this? What does the removed seal look like? What are its critical dimensions? What service will the replacement enter? If those four groups agree, the supplier can compare references, drawings, and available replacement designs much more reliably.
What Should You Send for Mechanical Seal Identification?
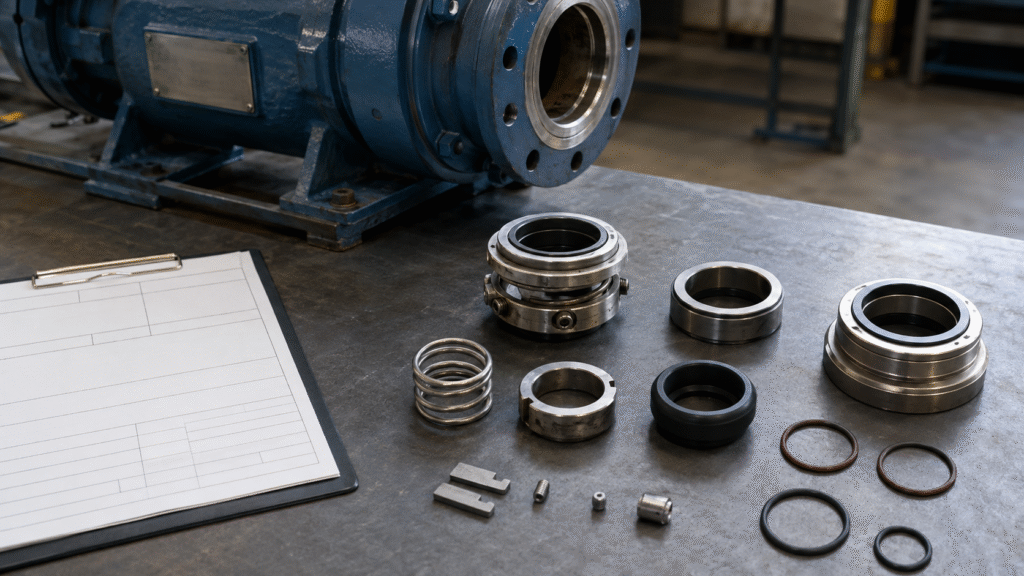
A strong mechanical seal identification request combines pump data, photographs, dimensions, and application information. None of these groups should stand alone. A pump model can narrow the search, while the removed seal shows what is actually installed. Dimensions separate similar designs, and operating data helps confirm whether the replacement materials remain suitable.
Whenever possible, send all information in one message or one file set. Keep information from different pumps separate. If several seals are being identified at the same time, give each pump and seal group its own reference name so photos and measurements cannot be mixed.
Start With the Pump Nameplate
Send a sharp photograph of the pump nameplate before cropping individual details. In addition, the supplier should be able to read the manufacturer, complete model, product number, serial number, and production code. Motor size, frequency, and speed can also help when a pump family uses different configurations across motor or regional versions.
Do not send only descriptions such as “Grundfos CR,” “Flygt pump,” or “Lowara vertical pump.” These names identify broad product families rather than one exact machine. Therefore, pump manufacturers themselves use product and serial information to connect equipment with documentation and spare parts. Therefore, preserve suffixes, production codes, and other nameplate details whenever they are readable.
If the nameplate is damaged, photograph the remaining label and record any numbers from previous maintenance documents. Then keep that information with the seal photographs rather than guessing a complete model from pump appearance.
Which Mechanical Seal Photos Should You Take?
Photographs are most useful when they document the full assembly from several simple angles. For mechanical seal identification, the supplier needs to see both the rotating component and the stationary component. Do not photograph only the spring assembly and discard the seat.
Therefore, a practical photo set includes: the complete old seal, rotating assembly front view, rotating assembly side view, rear spring or bellows structure, stationary seat front view, stationary seat side view, O-rings or rubber cups, markings or engraving, the pump seal chamber when useful, and the pump nameplate.
Rotating Assembly
Photograph the rotating assembly before separating parts further. Then take a front view that shows the face and an accurate side view that shows the spring, bellows, retainer, drive features, and overall profile. If the seal has already broken apart, arrange the components in their original order as closely as possible.
Also, for cartridge seals, include the gland, sleeve, drive collar, and bolt arrangement in the same photo group. However, do not dismantle a cartridge only to create more photographs unless the maintenance procedure already requires disassembly.
Stationary Seat
Next, take separate front and side photographs of the stationary seat. Show the precision face, outside profile, mounting rubber or O-ring, and any cup or holder that belongs to it. A seat that appears simple can still distinguish two rotating assemblies that otherwise look almost identical.
Likewise, if the seat is cracked, keep all fragments together and photograph the complete set. Do not throw away a broken ceramic, silicon carbide, or tungsten carbide piece before the replacement has been identified.
Markings and Small Components
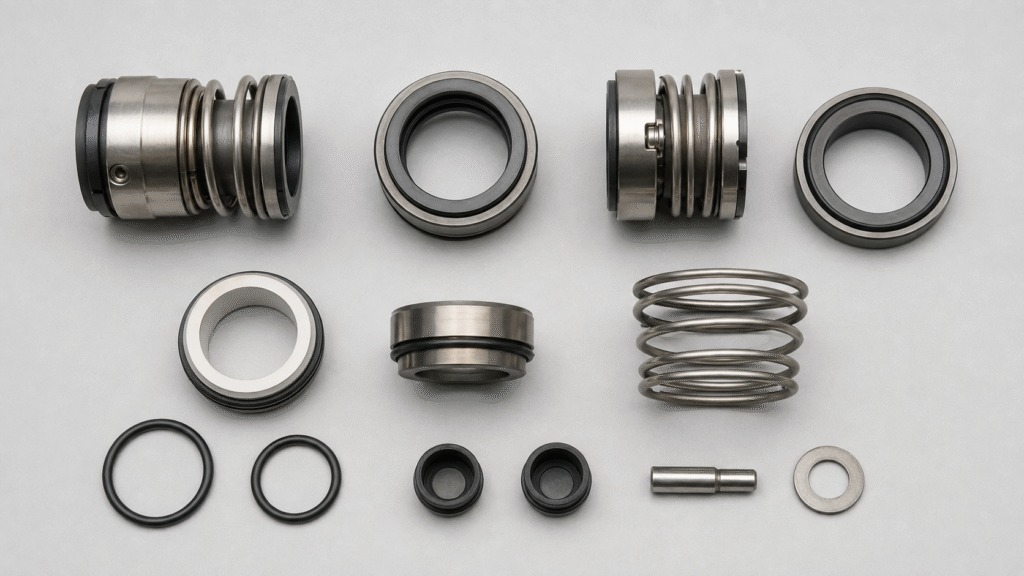
Next, photograph each marking, engraving, part number, logo, or code at close range. Also include O-rings, rubber cups, washers, drive pins, springs, clips, retainers, and spacers. Small parts can reveal how the original assembly was located or driven.
However, markings should support the request rather than replace the physical evidence. Old pumps may contain aftermarket seals or mixed repair components, so a reference should still agree with the pump and dimensions.
How to Take Photos That Are Useful for Identification
First, use a clean, plain background and good diffuse lighting. Place the camera approximately perpendicular to the part for front and side views. Heavy perspective angles can distort diameters and lengths, while reflections can hide face details or engraved markings.
Next, keep the full component inside the frame. Take an overall photograph first, then closer views for details. Avoid holding several small components in your hand because fingers can hide geometry. In addition, keep parts from different pumps in separate groups and photograph each group before moving to the next machine.
Identification photography does not need to look polished. It needs to preserve shape, orientation, condition, and markings accurately. A simple clear photograph is more useful than a dramatic close-up that removes context.
Which Mechanical Seal Dimensions Should You Send?
Therefore, dimensions help a supplier distinguish seals that share the same general appearance. For a standard component seal, provide the shaft or sleeve diameter, rotating seal ID, rotating assembly OD, free length, working length when available, stationary seat OD, stationary seat ID, and seat thickness.
In addition, for rubber-cup seats or bellows designs, include relevant rubber dimensions when they affect fit. For a cartridge, gland diameter, register dimensions, sleeve size, and bolt pattern may also matter. Always state whether measurements use millimeters or inches.
This article does not repeat the measuring procedure because the mechanical seal measurement guide already explains where and how to take each dimension. Use that guide when a supplier asks for more accurate dimensional confirmation.
Why the Stationary Seat Must Be Included
However, one of the most common mechanical seal identification problems is an inquiry that includes excellent photographs of the rotating assembly but no stationary seat. The supplier then knows only half of the primary sealing pair.
The seat outside diameter, inside diameter, thickness, mounting style, and rubber arrangement can separate replacement options that use the same shaft size. Therefore, send the seat even when it looks like a standard ceramic ring. A replacement rotating element that fits the shaft may still be incompatible with the pump’s seat bore or axial geometry.
If possible, keep the rotating component and its original stationary seat together until the replacement has been confirmed.
Keep All Removed Parts Together
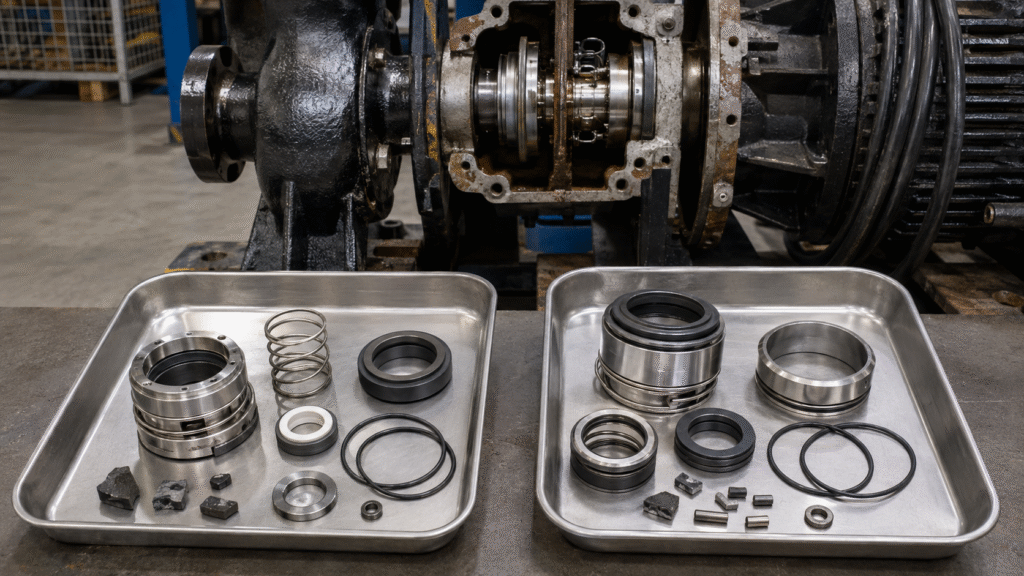
Therefore, do not discard O-rings, rubber cups, washers, drive pins, springs, clips, retainers, spacers, or broken face pieces. These items may help reconstruct the original mechanical seal identification record, especially when the main seal has no readable reference.
For pumps with two seals, label the components before mixing them on a workbench. Distinguish upper from lower, inner from outer, or process-side from atmospheric-side positions according to the pump arrangement. If you are uncertain about the terminology, describe the physical position instead of guessing.
Mixing components from two pumps can create a false seal assembly that no supplier can identify reliably. Keep each pump’s removed parts in a separate tray or bag until the request is complete.
What Operating Information Should You Include?
Next, once the supplier understands the physical seal, provide basic operating data: pumped fluid, chemical concentration where relevant, temperature, pressure, shaft speed, solids, and any known previous failure. This information helps the supplier check whether the identified replacement should keep the same material configuration.
Keep this section concise. Detailed face-material, elastomer, and arrangement decisions belong in the mechanical seal selection guide. For identification requests, the objective is to flag conditions that could make an apparently correct replacement unsuitable for the actual service.
If the process has changed since the old seal was installed, say so clearly. A correct geometric match may still need different materials or a different arrangement.
Information That Is Usually Not Enough
“25 mm mechanical seal” is not a complete identification request. Neither is “this looks like MG1,” “for Grundfos pump,” one blurry photograph, only a shaft diameter, only a pump series, or only the visible color of a face or O-ring.
However, each clue can narrow the search, but none confirms the entire assembly. A 25 mm shaft can accept many unrelated seal designs. Similar springs can hide different working lengths, and similar seats can use different thicknesses or mounting profiles. In addition, O-ring color is not a reliable material identification method.
When information is limited, tell the supplier which details are missing instead of filling gaps with assumptions. Clear uncertainty is more useful than an incorrect specification.
How to Organize Photos and Measurements
First, use a simple file naming or numbering system. Label the pump nameplate, rotating component, stationary seat, side views, markings, and dimensions so the supplier can connect each item with the correct component. If several pumps are involved, begin every file group with a unique pump reference.
Next, state units beside every dimension. Also explain whether a dimension comes from an undamaged metal or hard-face surface, a worn rubber part, or an estimated original position. For double-seal pumps, label the installation position of each seal group before sending the files.
The supplier should not need to guess which seat belongs to which rotating assembly. Good organization makes the mechanical seal identification review faster and reduces avoidable follow-up questions.
Mechanical Seal Identification Request Checklist
Use this checklist before sending an inquiry.
Pump
- Manufacturer
- Complete model
- Serial or product number
- Production code when available
- Complete nameplate photo
Seal
- Complete old seal photo
- Rotating assembly front and side views
- Stationary seat front and side views
- Rear spring or bellows structure
- Markings or engraving
- O-rings, cups, retainers, pins, clips, and broken pieces
Dimensions
- Shaft or sleeve diameter
- Rotating seal ID
- Rotating assembly OD
- Free length
- Working length when available
- Stationary seat OD
- Stationary seat ID
- Stationary seat thickness
- Relevant cartridge or gland dimensions
Application
- Pumped fluid
- Chemical concentration when relevant
- Temperature
- Pressure
- Speed
- Solids
- Required quantity
Before sending the package, compare it with the correct mechanical seal identification guide if you want to understand how pump references, seal families, dimensions, and application data are cross-checked into a final replacement decision.
Mechanical Seal Identification FAQ
Do I Need to Clean the Old Seal Before Taking Photos?
Remove loose dirt that hides the geometry, but do not aggressively polish damaged faces or erase useful deposits and markings. If the seal failed, its condition may contain diagnostic evidence. Photograph the parts before heavy cleaning whenever practical.
Should I Put a Ruler Beside the Seal in Every Photo?
A ruler can provide rough scale, but it should not replace recorded dimensions. Perspective can make scale references misleading. Send direct measurements separately and use front and side photographs to document shape.
Can a Supplier Identify a Seal From One Photo?
Sometimes a familiar seal family can be recognized, but one photograph rarely confirms every fit detail. A reliable request normally combines pump identity, rotating and stationary components, dimensions, and application information.
Should I Send the Pump Model Even if I Have the Old Seal?
Yes. The pump identity provides an independent reference that can confirm or challenge the physical seal. This is especially useful when the pump has been repaired before or when the removed assembly contains aftermarket components.
What Should I Send if the Seal Is Completely Broken?
Send every remaining component, the stationary seat, fragments, spring or bellows, retainers, markings, pump nameplate, critical dimensions, and application information. Do not discard broken pieces until the replacement has been confirmed.
Good mechanical seal identification depends on the quality and organization of the information supplied. Send a complete pump nameplate, clear rotating and stationary seal photographs, critical dimensions, markings, application data, and quantity. With those details together, a supplier can evaluate the replacement with far fewer assumptions and ask focused questions only where information is genuinely missing.