Learning how to measure a mechanical seal accurately means recording more than one diameter. A useful measurement set should cover the shaft or sleeve, rotating assembly, and seal face. It should also include free length, working length, and the stationary seat. The goal is to capture stable dimensions that support replacement identification.
Before handling the seal, isolate the pump and release pressure. Allow hot equipment to cool, and manage hazardous fluid according to site procedures. Keep removed parts organized and clean. Accurate measurement depends on stable reference surfaces, light measuring pressure, correct tool alignment, repeated readings, and clearly recorded units.
Quick Answer: What Dimensions Should You Measure?
When learning how to measure a mechanical seal, start with dimensions that define shaft and seat fit. Then record the axial installation space. Record every reading with units, note whether the reference is rigid or flexible, and avoid early rounding. Use a separate mechanical seal identification guide for final replacement selection.
| Dimension | What to record |
|---|---|
| Shaft / sleeve diameter | Actual diameter at clean, unworn locations |
| Rotating seal ID | Rigid bore or contact diameter |
| Rotating assembly OD | Maximum rigid OD; flexible OD separately if needed |
| Seal face dimensions | Face OD, face ID, and useful thickness |
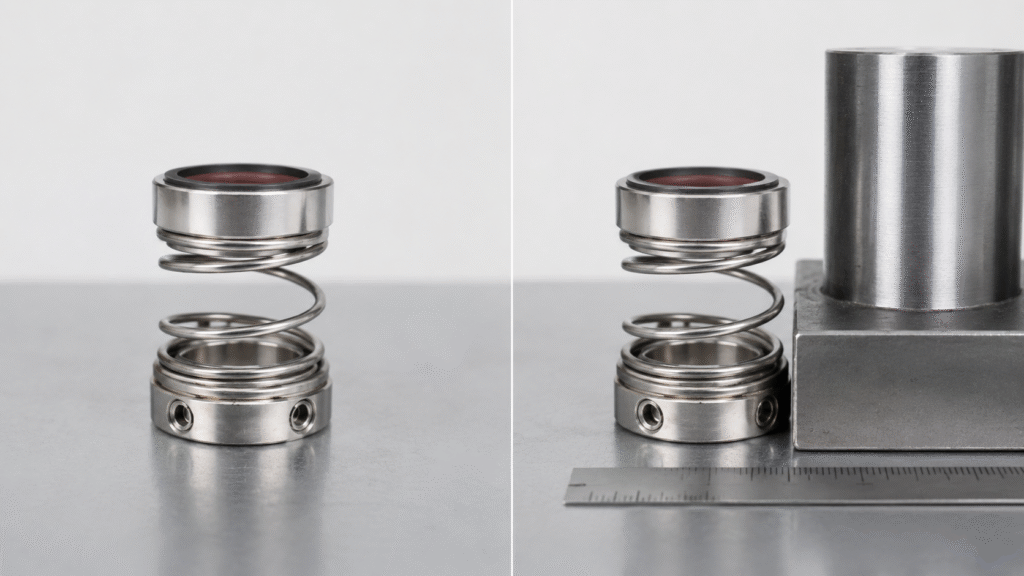
| Free length | Relaxed axial length before installation compression |
| Working length | Specified installed axial operating dimension |
| Stationary seat OD / ID | Rigid dimensions and rubber-cup dimensions separately |
| Stationary seat thickness | Relevant axial thickness |
| Stationary seat profile | Cup, O-ring, step, L-shape, pin feature, or other geometry |
| Cartridge dimensions | Shaft size, register, bolt pattern, sleeve length, ports, overall length |
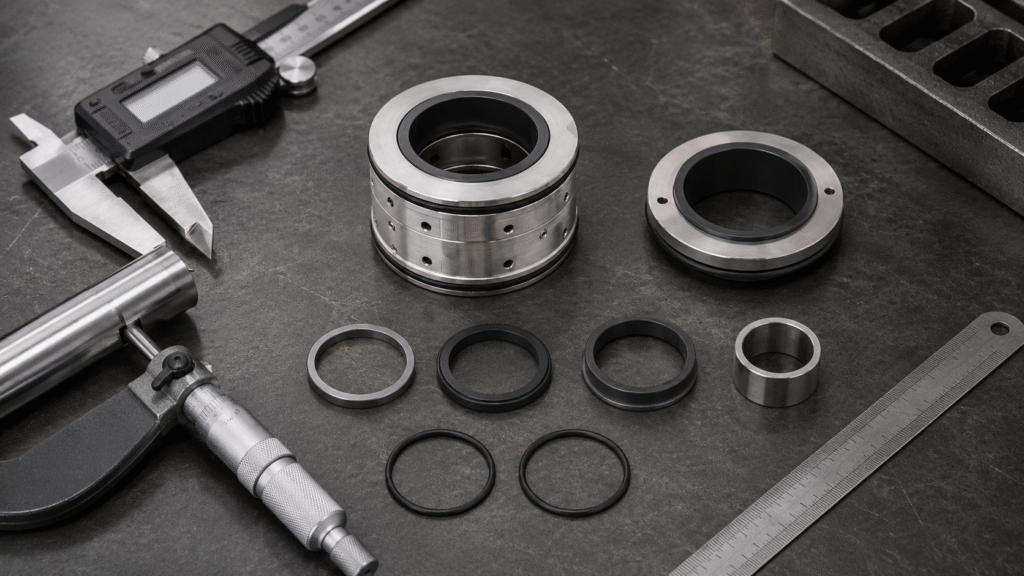
Tools for Measuring a Mechanical Seal
Knowing how to measure a mechanical seal also means choosing the right tool. A digital caliper works well for most outside diameters, inside diameters, steps, and axial lengths. Clean jaws, square contact, controlled pressure, and repeated readings still matter for accuracy.
Use an outside micrometer when you need more precise shaft or sleeve confirmation, especially where small differences affect fit. A ratchet or other constant-force mechanism can improve repeatability. A depth gauge can help with recessed seat depth, while a steel ruler should remain a rough-reference tool. The Mitutoyo precision measuring guide covers these instrument types.
Before Measuring: Keep the Original Assembly Information
Before deciding how to measure a mechanical seal after removal, record the complete assembly and orientation. Also record the stationary-seat position, spring or bellows direction, markings, and pump nameplate. Photograph the parts before aggressive cleaning, and keep small cups, holders, spacers, pins, washers, and retaining parts together. For a full checklist, use the guide on what information to send for mechanical seal identification.
Step 1: Measure the Shaft or Sleeve
The shaft or sleeve diameter is the first rigid reference when learning how to measure a mechanical seal. Clean the contact area and avoid deep wear grooves, burrs, corrosion, keyways, and heavy deposits. If possible, use an outside micrometer. Measure several circumferential and axial positions to reveal ovality, taper, or local wear.
Record the actual readings before assigning a nominal size. Do not immediately round a value such as 24.96 mm to 25 mm. Wear, technique, temperature, or an imperial dimension may explain the difference. Compare it with pump information and other rigid seal dimensions before deciding the nominal system.
Step 2: Measure the Rotating Seal
Inside Diameter
First, determine what actually contacts the shaft or sleeve. A rigid bore gives a stable reference. A rubber bellows bore or elastomer contact area may change after service because of swelling, compression, or permanent deformation. Measure the rigid bore whenever possible. For rubber contact, record the relaxed ID gently and note its condition.
Outside Diameter
Measure the maximum rigid outside diameter while keeping the caliper square to the component. If the largest area is a flexible bellows, record the rigid OD and the relaxed flexible OD separately. Do not squeeze the rubber to force a stable display.
Seal Face Dimensions
Record the rotating face OD and ID, plus axial face thickness when that dimension helps distinguish similar designs. Handle carbon, ceramic, silicon carbide, and tungsten carbide faces carefully because the lapped surfaces are precision sealing surfaces. Use light contact on stable reference edges and avoid dragging jaws across the sealing track.
Step 3: Measure Free Length
Free length is the relaxed axial length of the rotating seal assembly before installation compression. Measure it with the spring or bellows in its natural unloaded state and record the exact start and end reference surfaces for repeatability during each inspection.
A used seal may not return to its original free length. Spring fatigue, elastomer deformation, deposits, corrosion, or damaged drive parts can change the relaxed position. Therefore, free length is an identification clue, not proof of the original installation setting.
Step 4: Confirm Working Length
A major part of knowing how to measure a mechanical seal is confirming working length, the installed axial position or compressed operating dimension defined by the seal design. It controls spring or bellows compression and face loading, so an incorrect value can cause heat, wear, or leakage.
Do not estimate working length by squeezing a used seal by feel. Confirm the installed reference from the pump drawing, seal drawing, original installation record, shaft shoulder, drive position, locating feature, or manufacturer instruction. If no reliable reference remains, state clearly that working length is unconfirmed.
Free Length vs Working Length
| Item | Free Length | Working Length |
|---|---|---|
| When measured | Before installation compression | At the specified installed position |
| Seal condition | Relaxed spring or bellows | Compressed according to design |
| Purpose | Identification and comparison | Correct axial setting and face loading |
| Risk if confused | Used free length may not equal original geometry | Wrong compression can cause leakage, heat, or wear |
Free length and working length are related but not interchangeable. Therefore, record them on separate lines in every mechanical seal measurement sheet, especially when a used spring or elastomer no longer returns to its original condition. Confusing the two can make an otherwise accurate dimensional record misleading.
Step 5: Measure the Stationary Seat
Outside Diameter
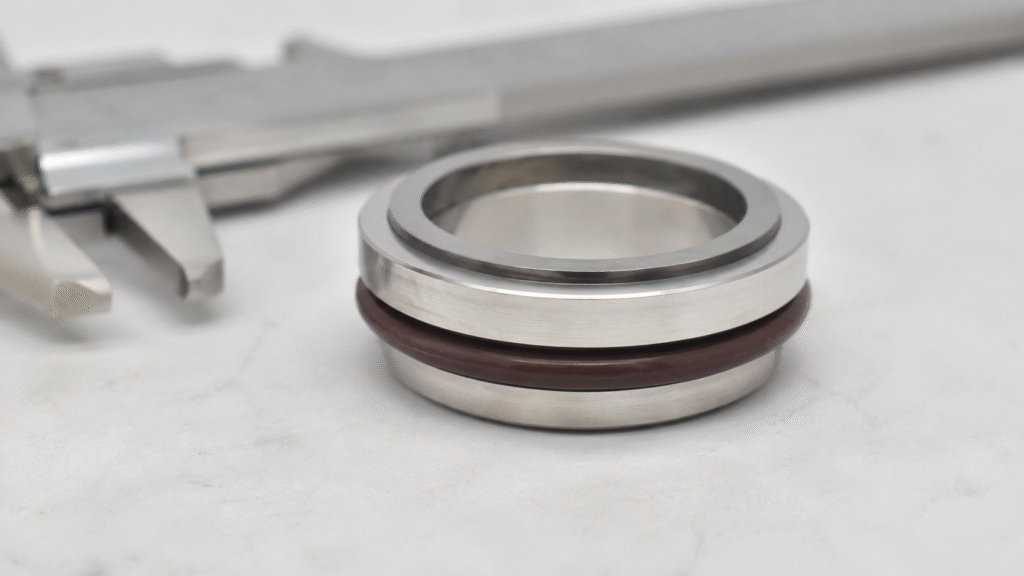
Measure the rigid stationary-seat OD first. If the seat uses a rubber cup, also record the relaxed cup OD separately instead of reporting only the compressed or swollen rubber dimension. Take several readings and note any step, flange, shoulder, or holder that changes the profile.
Inside Diameter
Measure the central opening without assuming that it equals shaft diameter. The opening may provide shaft clearance, while a rubber cup or metal holder can create another visible ID behind the lapped ring. Record exactly which feature you measured in the notes.
Thickness
Measure the relevant axial seat thickness and identify the reference faces used. Equal outside diameter does not make two stationary seats interchangeable, because a different thickness can shift face position and alter working length. Use stable rigid reference faces and avoid heavy pressure on brittle or lapped surfaces.
Mounting Profile
Record whether the seat appears O-ring mounted, rubber-cup mounted, stepped, L-shaped, or equipped with a pin or anti-rotation feature. Do not force every design into one universal naming system. A side photograph plus dimensions is more useful than an uncertain style name.
How to Measure Rubber Bellows Seals
Rubber bellows seals need extra caution because used elastomer dimensions can change after service. Record the relaxed bellows length, rigid face dimensions, rigid OD or ID references, and the rear mounting profile. Note swelling, flattening, cracking, hardening, or permanent stretch before deciding which dimensions remain trustworthy.
Use light pressure on flexible sections and keep rigid measurements separate from relaxed rubber dimensions in your notes. When learning how to measure a mechanical seal of this type, stable metal and hard-face references should carry more weight than deformed elastomer dimensions.
Additional Measurements for Cartridge Seals
For a cartridge seal, confirm shaft or sleeve diameter, gland register, bolt pattern, overall axial length, sleeve length, and port positions where relevant. Focus on the mounting envelope rather than recreating the complete engineering drawing. After confirming dimensions, use the Cartridge Mechanical Seal Installation guide for setting clips, gland sequence, drive collar, support piping, and commissioning.
Metric vs Imperial Mechanical Seal Sizes
Near-equivalent metric and imperial dimensions can create identification errors. Record the actual reading first, then compare pump origin, old drawings, shaft measurement, stationary-seat dimensions, and other rigid dimensions. A worn metric shaft can appear close to an imperial size, so do not round early simply to fit a familiar catalog dimension. Write units beside every value.
How to Measure a Damaged Mechanical Seal
When learning how to measure a mechanical seal after damage, use stable references first. For broken carbon, cross-check the holder, shaft, stationary seat, and intact fragments. For swollen rubber, prioritize rigid dimensions. Do not use a damaged spring free length to reconstruct the original setting. If the seat is missing, measure the housing or gland bore and use pump documentation.
Common Mechanical Seal Measurement Mistakes
Common errors include measuring only the shaft, ignoring the stationary seat, confusing free length with working length, and treating worn rubber as a rigid dimension. Technicians also round readings too early, forget units, tilt the caliper, apply excessive pressure, or measure across dirt, corrosion, or damaged edges.
Another mistake is relying on photographs without written dimensions. Camera perspective can hide scale, and glare may hide a caliper display. Repeat important measurements, record the reference surfaces used, and flag any value affected by wear, deformation, corrosion, or breakage.
Mechanical Seal Measurement Record
A repeatable form helps standardize how to measure a mechanical seal. Keep dimensions separate from broader identification and application data so another technician or supplier can see exactly which values were measured and which information came from documentation or drawings.
| Item | Measurement |
|---|---|
| Shaft / sleeve diameter | |
| Rotating seal ID | |
| Rotating assembly OD | |
| Rotating face OD / ID / thickness | |
| Free length | |
| Working length | |
| Stationary seat OD | |
| Stationary seat ID | |
| Stationary seat thickness | |
| Stationary seat profile | |
| Cartridge register / bolt pattern | |
| Units: mm or inch |
After completing the record, submit it with clear photographs and pump data. The measurements support identification, but they should not replace the original seal reference, pump model, or manufacturer documentation when those sources are available, readable, and reliable for the actual pump.
FAQ
What Is the Most Important Mechanical Seal Measurement?
The shaft or sleeve diameter is the main starting dimension, but it is not sufficient by itself. Rotating dimensions, stationary-seat geometry, and working length can distinguish seals that share one shaft size, so record them together during every measurement session.
Can I Measure a Mechanical Seal With Only a Digital Caliper?
A digital caliper can measure many seal dimensions, but it should not confirm every feature alone. An outside micrometer is better for precise shaft or sleeve checks; a depth gauge helps with recessed depths. A steel ruler should remain a rough-reference tool for overall dimensions only.
How Do I Measure Working Length on a Used Seal?
Do not derive working length by compressing the old seal by feel. Confirm the installed position from a drawing, shaft shoulder, drive location, original setting record, or manufacturer instruction. If that evidence is missing, report the value as unconfirmed instead of estimating it from spring feel.
Should I Round a Reading Close to a Standard Size?
No. Record the actual value first, including the unit. Then compare metric and imperial possibilities, wear, pump documentation, and the remaining seal dimensions before deciding the likely nominal size and ordering a replacement seal. Keep the original reading in your notes.
Conclusion
Knowing how to measure a mechanical seal accurately requires a consistent set of rigid dimensions and clearly defined reference points. Start with the shaft or sleeve, then record the rotating seal, face dimensions, free length, working length, and stationary-seat geometry without mixing relaxed and installed values.
Use suitable tools, light measuring pressure, repeated readings, and explicit units. Finally, combine the measurement record with photographs and pump data for identification. Accurate dimensions reduce uncertainty, but final replacement selection still depends on comparing those dimensions with the actual seal and equipment.
Once the required dimensions and seal configuration have been confirmed, you can also browse our pump mechanical seal range for available replacement options.