Cartridge seal installation looks simple because the seal arrives as a preassembled unit. That convenience can also create false confidence. The cartridge still depends on the pump shaft, seal chamber, gland face, piping, and final rotor position. Therefore, a correct installation begins before the seal slides onto the shaft and ends only after the pump starts under stable conditions.
A useful way to think about the job is this: the setting clips preserve the seal manufacturer’s internal position, but they cannot correct a damaged pump. If the shaft has excessive runout, the chamber is dirty, or the support piping is wrong, the new seal can leak immediately. This guide follows the actual installation sequence and highlights the errors that matter most.
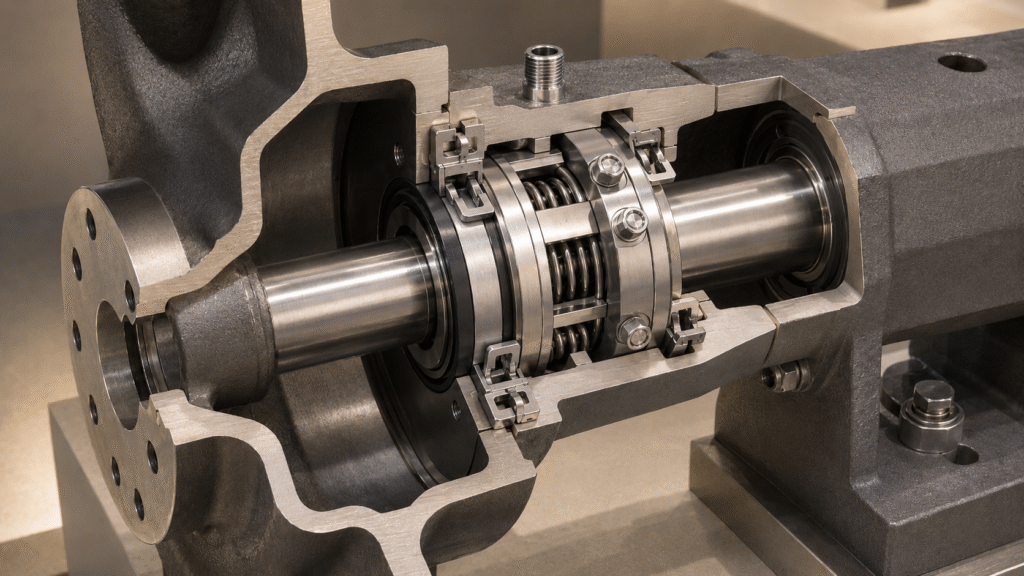
Before the Cartridge Reaches the Shaft
Do not open the seal package and immediately start assembly. First, isolate the pump according to site procedures, release stored pressure, drain the equipment, and confirm that the driver cannot start. Next, clean the work area and keep removed hardware away from the new seal.
Next, confirm that the new seal matches the equipment before removing protective packaging. Check the pump model, shaft or sleeve diameter, gland arrangement, seal chamber dimensions, and required connections. If the old seal is unfamiliar, use a guide on how to identify the correct mechanical seal before installation. A cartridge that fits over the shaft is not automatically the correct cartridge.
Inspect the Pump, Not Only the New Seal
In addition, the seal chamber face should be clean and free from deep corrosion, gasket residue, or raised damage. Also inspect the shaft or sleeve for burrs, grooves, sharp shoulders, and keyways that could cut a secondary seal. In addition, check shaft runout, axial movement, and bearing condition when the pump history suggests a mechanical problem.
This inspection is important because cartridge seal installation removes the need to set face working length manually, but it does not remove equipment tolerances. Therefore, correct a bent shaft or unstable bearing before installing the new seal. Otherwise, the preset assembly will simply follow an unstable rotor.
Step-by-Step Cartridge Seal Installation
The exact cartridge seal installation sequence can vary with seal family and pump construction. Therefore, the pump drawing and seal manufacturer’s instructions always take priority. The steps below describe the common logic used on many cartridge seals for centrifugal pumps. Keep the setting clips, spacers, or setting devices engaged until you secure the gland and drive collar in the correct sequence.
Step 1: Prepare the Shaft and Seal Chamber
Remove rust, old gasket material, deposits, and sharp edges from the installation path. Then wipe the shaft, sleeve, chamber face, and gland contact area with suitable clean materials. Avoid leaving abrasive particles, lint, or excess solvent around the sealing surfaces. Therefore, use only the lubricant recommended for the seal’s secondary elements. Apply a light amount where the instructions require it. However, do not coat the lapped seal faces with grease unless the manufacturer specifically instructs you to do so. Excess lubricant can contaminate the sealing interface or affect some elastomers.
Step 2: Slide the Cartridge Onto the Shaft
Next, with the setting devices still secured, slide the cartridge carefully over the shaft or pump sleeve. Keep the cartridge supported and square to the shaft as it moves. If it stops unexpectedly, remove it and inspect the obstruction. Forcing it forward can cut a secondary seal or damage internal alignment.
Then, during cartridge seal installation, check the orientation of flush, vent, drain, quench, or barrier-fluid ports. Their final positions must allow practical piping and venting. A cartridge mechanical seal range may use several gland layouts, so confirm port orientation before access becomes limited.
Step 3: Seat and Tighten the Gland Evenly
Next, bring the gland squarely against the seal chamber and confirm that the gasket or static sealing element remains correctly positioned. Then, start all gland fasteners by hand. Next, tighten them gradually in a diagonal or cross pattern. Use the torque sequence and values specified for the pump and seal rather than copying a number from another installation.
Uneven tightening can distort the gland or pull the cartridge off center. Therefore, watch the gland gap around the circumference as the fasteners tighten. It should seat evenly instead of letting one bolt drag it into position. Stop if the gland does not approach the chamber uniformly.
Step 4: Put the Rotor in Its Final Axial Position
This step is easy to miss during cartridge seal installation. The impeller, shaft, bearings, and coupling must reach their intended operating position before the drive collar is finally locked. Otherwise, later rotor movement can shift the cartridge sleeve after the setting devices no longer control its position.
Next, complete the pump assembly as its instructions require. Once you establish the final rotor position, tighten the cartridge drive collar set screws evenly according to the seal instructions. Do not confuse drive screws with other screws that only retain collar components.
Step 5: Remove the Setting Clips at the Right Time
Only after you secure the gland and lock the drive collar should you release the setting clips or spacers, unless the seal instructions specify another sequence. These devices hold the cartridge at its preset installation position. Removing them too early allows the internal assembly to move before the pump establishes the final shaft position.
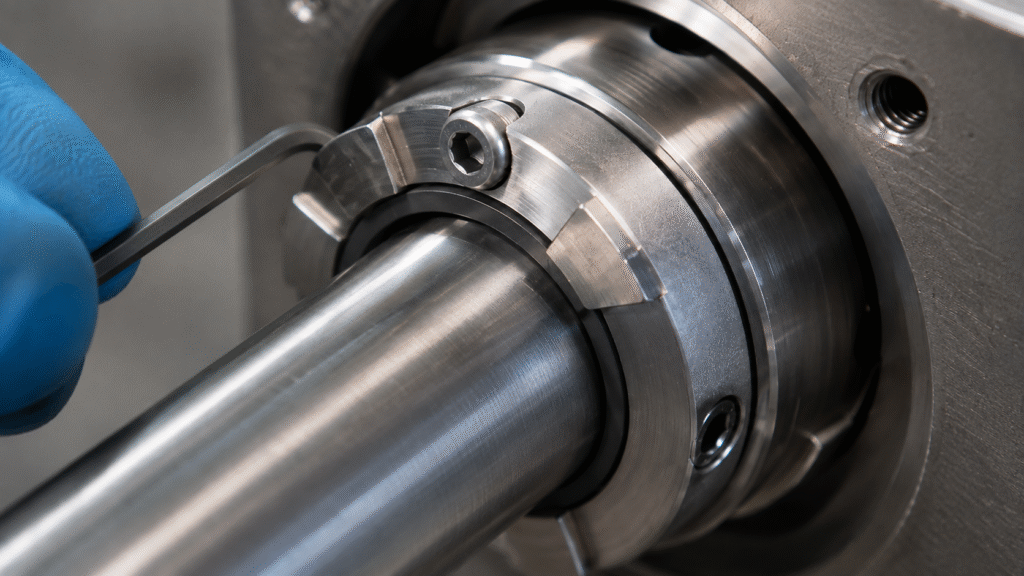
In addition, save the clips and fasteners because some designs reuse them during removal or repair. The John Crane standard cartridge seal instructions follow this general sequence: secure the gland, lock the drive collar, remove the setting devices, and then check free shaft rotation.
Step 6: Rotate the Shaft Before Connecting Power
Next, after releasing the setting devices, turn the shaft by hand when the equipment design allows it. Rotation should feel smooth and free from scraping or binding. If resistance appears, stop and investigate. A cartridge that binds before startup will not improve after the motor reaches operating speed.
Also confirm that no setting clip remains partly engaged. The Flowserve KeyPS seal instructions similarly call for hand rotation after technicians remove the setting devices. Therefore, this simple check is one of the last opportunities to catch an assembly problem without damaging the faces.
Connect the Seal Support System Before Startup
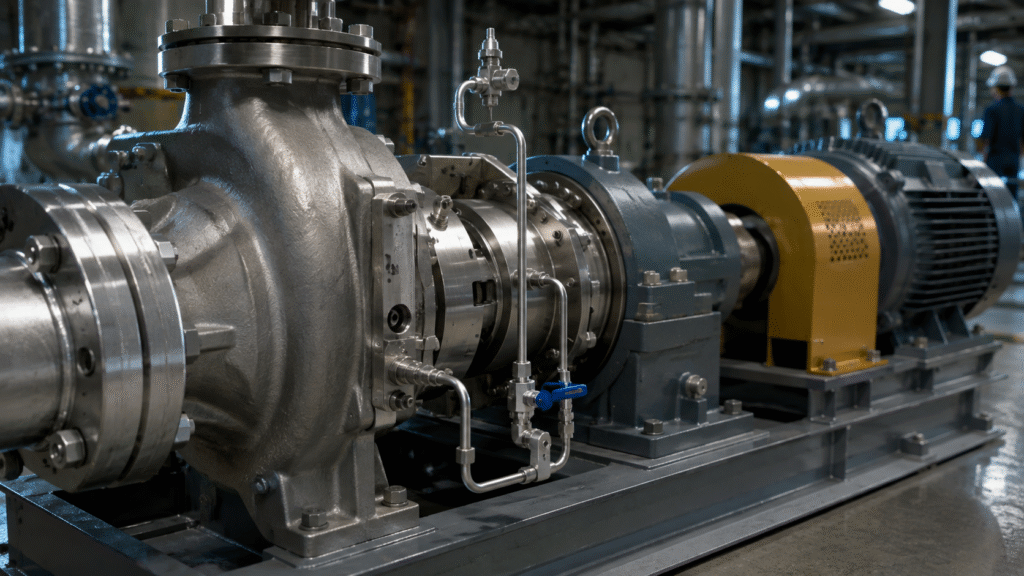
Cartridge seal installation is incomplete when its piping is wrong. Connect the specified flush, vent, quench, drain, buffer, or barrier lines according to the approved arrangement. In addition, replace shipping plugs as required, and keep piping loads from pulling the gland out of alignment.
For process-side circulation systems, the article on API 682 seal flush plans explains why flow direction, cooling, venting, and line arrangement matter. Do not copy piping from a neighboring pump unless both services truly match. A blocked flush or air-filled cooler loop can create a seal problem even after technicians install the cartridge correctly.
Venting Is Part of Installation, Not Startup Cleanup
Because liquid-lubricated seal faces need a stable liquid environment, venting must be complete. Therefore, fill and vent the pump and seal chamber before startup. Air trapped around the faces reduces cooling and can contribute to rapid heating. For dual seals, confirm that the support system contains the correct fluid and reaches its operating condition before you apply process pressure. Follow the seal-system drawing for pressure and circulation requirements. Do not invent a universal barrier-pressure value, because the correct setting depends on the specific seal and pump duty.
The First Startup Is an Installation Test
Cartridge seal installation also includes a protected first startup. Do not use a dry motor bump when the seal would run without lubrication. Confirm rotation by an approved method that protects the seal. Before starting, open the required valves, establish flush or support flow, prime the pump, and vent the seal chamber completely.
Next, during the first run, watch the gland area, pressure, vibration, noise, and temperature trend. Do not ignore a new cartridge simply because it does not leak immediately. For example, a closed flush valve may cause heat before visible leakage develops. Therefore, treat the first operating period as confirmation of the entire installation.
Know When to Stop the Pump
Stop the equipment when leakage increases quickly, the seal runs unusually hot, the shaft produces abnormal noise, or the pump develops severe vibration. Continuing to run can turn a correctable installation issue into damaged faces and elastomers. If a mechanical seal is leaking after installation, determine whether the leak appears while stopped, during startup, only while rotating, or after temperature rises. That pattern can separate a static sealing problem from runout, dry running, support-system failure, or incorrect seal setting.
Seven Common Cartridge Installation Mistakes
A common cartridge seal installation mistake is removing setting clips before technicians secure the gland and drive collar. The second is locking the drive collar before the rotor reaches its final axial position. Both errors defeat the main advantage of a preset cartridge and can change the intended operating position of the faces.
Third, installers sometimes tighten gland bolts unevenly. Fourth, they force the cartridge over burrs, threads, or sharp shoulders. Fifth, they use an unsuitable lubricant or contaminate the precision faces. Sixth, maintenance teams sometimes connect the correct ports in the wrong flow direction or leave a required flush closed. Seventh, they start the pump with trapped air or without adequate liquid. In each case, the seal may look properly mounted from outside. However, the operating environment is already wrong.
What Cartridge Installation Does Not Fix
Manufacturers design a cartridge to simplify setting and assembly, not to repair the pump. Excessive shaft runout, worn bearings, pipe strain, coupling misalignment, cavitation, or operation far from the intended duty point can still damage the faces. Therefore, repeated seal failures require a system investigation rather than repeated cartridge replacement.
Likewise, correct installation cannot compensate for unsuitable seal materials. Chemical attack, heat, or abrasive wear can damage a perfectly mounted cartridge. The general mechanical seal installation guide is useful for broader installation practices, but cartridge-specific instructions should control the setting-device sequence.
A Practical Handover Before Returning the Pump to Service
Before closing the work order, confirm tight gland fasteners and complete drive collar screws, then remove every setting device. Verify free shaft rotation, correct piping, open valves, filled support systems, and adequate venting. Also check that coupling guards and other safety components have returned to their required positions.
Record the seal model, material configuration, installation date, pump condition, and any measurements taken during the job. Also record the support-system condition and any abnormal startup observations. This record helps the next technician separate an installation error from later pump or process changes.
Conclusion
Good cartridge seal installation is less about measuring a spring length and more about controlling sequence. Inspect the pump first, keep the setting devices engaged, seat the gland evenly, establish the final rotor position, lock the drive collar, and release the clips only at the specified stage. Then verify rotation, piping, venting, and lubrication.
A cartridge reduces field-setting work, but it does not make installation automatic. Therefore, use the pump drawing and seal-specific instructions for every job. When technicians keep the machine clean, aligned, correctly piped, and properly commissioned, the cartridge can deliver consistent installation results.