A Flygt 3153.181 mechanical seal replacement should begin with exact pump configuration, not only the number “3153.181.” Pumps can differ by production revision, article number, serial number, and motor or hydraulic configuration. Ex status and previous repair history may also change the service parts. Therefore, verify replacement parts against the pump before service begins.
The sequence starts with pump identification, nameplate verification, and old-seal inspection. It continues through seal-position confirmation, dimensional verification, replacement comparison, installation, and commissioning. This guide focuses on that sequence. It does not replace Xylem/Flygt documentation for model-specific disassembly, electrical work, or lifting. The same applies to torque, oil quantity, impeller settings, and Ex procedures.
Start With the Exact Flygt 3153.181 Pump Identification
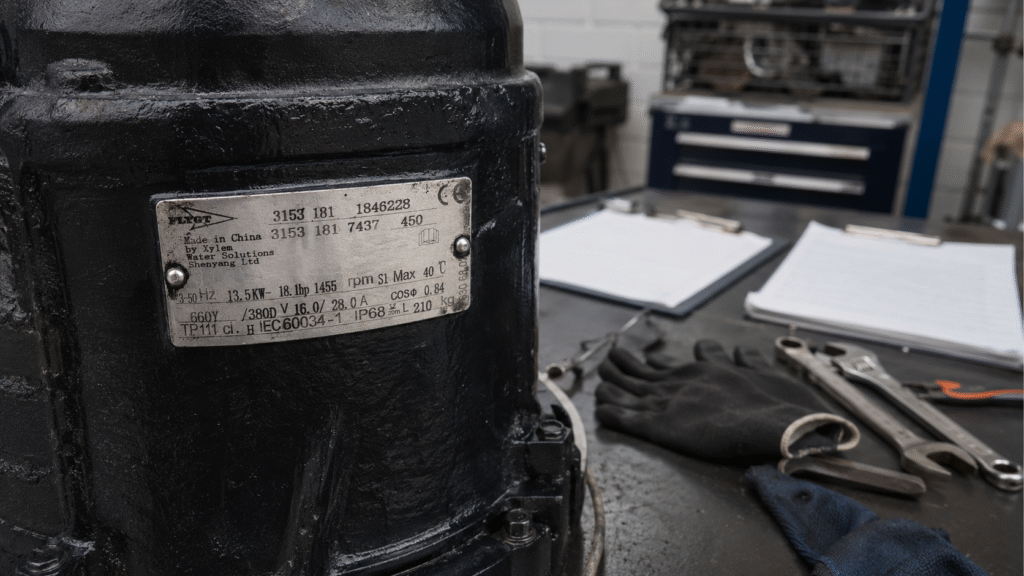
Mechanical seal service should start with the pump nameplate. Record the complete Flygt designation, full model number, product or article number, and serial number. Also record motor information, frequency, production information, and Ex marking where relevant. If the nameplate shows additional hydraulic or configuration codes, record them exactly rather than guessing what an unreadable field means.
Ordering only by “Flygt 3153.181” may not be enough. The safest verification combines the nameplate, the existing mechanical seal, critical dimensions, and the original part or service-kit reference when available. The Xylem Flygt N 3153 product page is useful for confirming the product family. However, the nameplate and service documentation should control the specific repair.
Why Flygt 3153.181 Is Not One Single Parts Configuration
Flygt 3153.181 identifies a pump family and version, not one guaranteed parts configuration for every unit in service. Production changes, motor ratings, hydraulic combinations, and impellers can alter the service parts inside the pump. Regional versions, Ex requirements, and earlier repairs can do the same.
For that reason, do not copy one 3153.181 nameplate and present its values as universal specifications. Its kW, voltage, current, frequency, speed, and temperature data belong to that configuration. A real nameplate is useful for identification, but always compare the pump record with applicable Xylem documentation before ordering.
Understanding the Upper and Lower Positions
Submersible sewage pumps can use separate sealing positions between the pumped liquid and the motor section. Depending on the exact configuration, technicians may encounter a lower or outer seal and an upper or inner seal. An oil or buffer chamber may separate these positions. Treat these positions as separate identification points.
The product-side position and motor-side position may use different geometry, materials, exposure conditions, and service components. Therefore, do not assume that an upper seal and lower seal are interchangeable. The Flygt Pump Mechanical Seals: Upper vs Lower Seals Explained guide provides the broader arrangement logic without assuming every 3153.181 uses an identical pair.
Inspect the Oil Chamber Before Replacement
Before disturbing the seal arrangement, inspect the oil or seal chamber where the specific pump configuration provides one. Record fluid appearance, level condition, emulsification, metallic particles, unusual debris, and signs of water ingress. These observations provide useful evidence about sealing-system condition before cleaning or discarding parts.
Milky or contaminated oil is a diagnostic clue, not proof that one specific face has failed. The Flygt Seals User Guide explains how buffer-fluid condition can provide leakage evidence. It also notes that service intervals and fluid levels depend on the product. Therefore, inspect relevant seals, shaft condition, sealing plugs, chamber sealing, and service history.
What Can the Old Mechanical Seal Tell You?
Do not discard the old Flygt 3153.181 mechanical seal immediately after removal. Used parts can preserve failure evidence that disappears after cleaning. Inspect face scoring, cracking, chipping, polished running tracks, uneven wear, deposits, and abrasive damage. Also check corrosion, elastomer swelling or hardening, metal-component corrosion, and shaft or sleeve wear.
Compare oil-side and product-side evidence, and keep parts from different seal positions separated. However, one damaged surface rarely proves a single root cause. Uneven wear may involve mounting or shaft movement, while deposits may reflect sewage conditions or stagnant areas. Compare old-seal evidence with pump condition and operating history.
How to Verify a Flygt 3153.181 Replacement Mechanical Seal
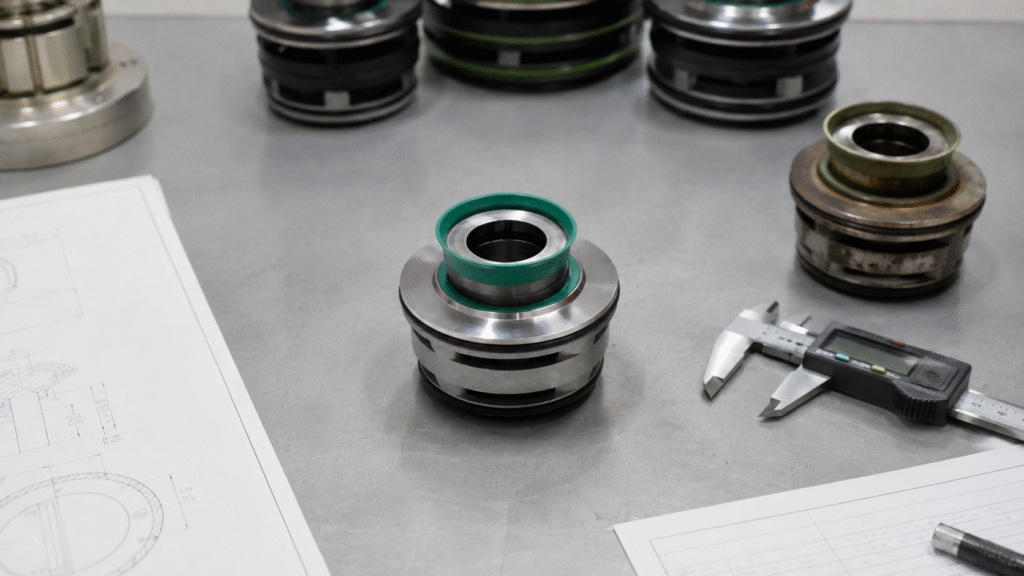
Approve a replacement only after it matches the verified pump and seal configuration. Check each Flygt 3153.181 mechanical seal against the pump before installation. “Looks similar” is not a compatibility method. Similar assemblies may still differ in working position, seat thickness, O-ring location, face dimensions, material grade, or mounting profile.
Pump and Nameplate Information
Confirm the full pump identity first. Compare model designation, article or product information, serial or production data, and any available original seal or service reference. When identification is incomplete, use the How to Identify the Correct Mechanical Seal for a Pump guide rather than relying on one visible feature.
Dimensions and Geometry
Confirm shaft or sleeve diameter, rotating assembly dimensions, stationary seat dimensions, overall geometry, and working position or working length where relevant. Also compare associated O-rings and locating features. The How to Measure a Mechanical Seal guide explains how to obtain these dimensions without turning this 3153.181 article into a general measurement tutorial.
Face and Elastomer Materials
Confirm the actual face and secondary-seal materials against the verified configuration and pumped medium. Carbon, silicon carbide, tungsten carbide, ceramic, NBR, FKM, or other compounds may appear in different applications. However, do not assume one combination is mandatory for every Flygt 3153.181 mechanical seal.
For broader material properties, use the Mechanical Seal Materials guide. For sewage, solids, abrasion, and product-side exposure, the Mechanical Seal Materials for Wastewater & Slurry Pumps guide provides the more relevant application discussion. Material changes should follow a technical compatibility review rather than a generic “upgrade” rule.
Upper or Lower Position
Finally, confirm which position the replacement serves. Check oil-side or product-side orientation, seat direction, mating components, and the replacement drawing or verified sample. If the available old-seal photographs do not prove whether a component is upper or lower, do not assign a position from appearance alone.
General Flygt 3153.181 Mechanical Seal Replacement Workflow
The following sequence is intentionally general and should not replace the pump service manual. Qualified personnel should isolate electrical power, prevent accidental startup, and isolate or drain the pumped liquid. They should also use appropriate lifting methods and control sewage exposure according to site and manufacturer procedures.
- Record the pump nameplate and current pump condition.
- Confirm the exact Flygt 3153.181 configuration.
- Record the existing seal arrangement before disassembly.
- Drain and inspect the oil or seal chamber where applicable.
- Access components using the applicable Flygt service documentation.
- Keep upper and lower seal components separated where applicable.
- Inspect the shaft, sleeve, seat bores, bearings, and surrounding parts.
- Compare the old seal with the replacement before installation.
- Confirm dimensions, materials, orientation, and service components.
- Install the verified seal according to the applicable instructions.
- Restore the oil or buffer chamber to the specified condition.
- Complete the required commissioning checks.
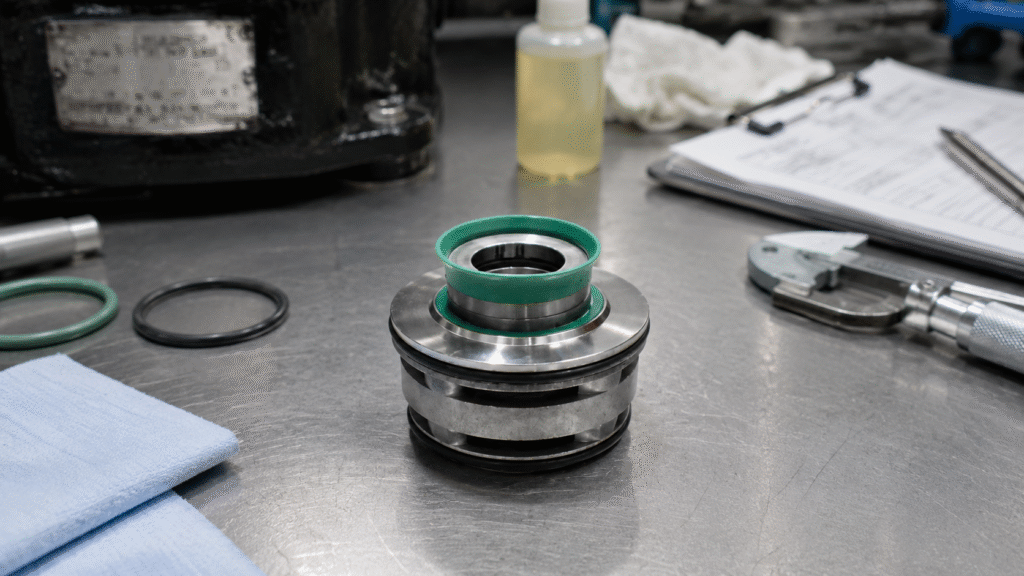
During installation, protect lapped faces, confirm stationary-seat orientation, and use elastomer lubricant only where the relevant instructions permit it. Verify chamber plugs, O-rings, and associated service parts before closing the pump. Use the Mechanical Seal Installation Guide for general seal-handling principles, while the exact Flygt procedure controls model-specific assembly.
What Must Follow the Official Flygt Service Documentation?
Never invent several critical service details from generic pump practice. Critical fastener torque, oil or buffer-fluid type and quantity, and impeller clearances require official service data. Model-specific dismantling, lifting instructions, electrical tests, and Ex requirements also require the applicable Flygt/Xylem documentation or an approved site procedure.
Do not calculate a “conservative” torque from bolt grade when the correct service value is unavailable. Likewise, do not invent oil quantity, preload, shim count, impeller setting, or insulation-test criteria. Electrical insulation, cable-entry, and motor checks should follow the applicable Flygt procedure and site electrical-safety requirements.
Commissioning Checks After Service
Commissioning should follow the applicable service procedure and the site maintenance plan. Before return to normal duty, verify correct pump reassembly. Confirm that chamber plugs and sealing components are secure, required oil or buffer fluid is restored to specification, and the replacement matches the documented repair.
During commissioning, observe leakage or moisture indications, seal-related alarms, oil or chamber condition, abnormal noise, vibration, motor current, overheating, and pump performance. Do not apply one universal ten-second run, 24-hour check, or fixed follow-up interval to every configuration. Maintenance intervals depend on operating hours, sewage severity, solids, duty cycle, pump configuration, previous history, and manufacturer recommendations.
Common Problems After Service
| Symptom | What to check |
|---|---|
| Moisture or leakage alarm soon after service | Seal orientation, O-rings, stationary seat, chamber plugs, shaft condition, upper/lower seal condition, cable entry where relevant |
| Oil becomes contaminated again | Seal faces, seat installation, shaft or sleeve, chamber sealing, other ingress paths |
| Repeated lower-seal damage | Abrasive solids, dry running, hydraulic condition, shaft movement, materials, replacement compatibility |
| Repeated upper-seal damage | Chamber condition, shaft or bearings, seal configuration, installation, heat |
| Excessive vibration | Bearings, shaft, impeller, hydraulic condition, assembly, not only the seal |
| Pump performance changes | Impeller condition, clearances, motor current, blockage, hydraulic condition, reassembly |
These symptoms should guide inspection rather than assign blame automatically. A leakage alarm can involve a mechanical seal, static plug, cable entry, or another leakage path. Likewise, vibration may come from bearings, shaft condition, impeller issues, hydraulics, or assembly. The Flygt 3153.181 mechanical seal is only one part of the pump system.
Information to Send Before Ordering
Before requesting a Flygt 3153.181 mechanical seal, send a clear nameplate photograph and complete model information. Also provide old-seal photos, known seal position, shaft size, critical dimensions, stationary-seat details, oil-chamber condition, pumped medium, and any existing part or kit reference.
Also state which seal position and purchasing scope you need. Use Flygt and Xylem trademarks, model numbers, and part references only for compatibility identification. Hong Teng independently manufactures these replacement seals unless documents state otherwise. Therefore, describe them as compatible replacements for selected Flygt applications rather than original Flygt parts.
Flygt 3153.181 Mechanical Seal FAQ
Does Every Flygt 3153.181 Use the Same Part?
No. The exact configuration can vary with production revision, article number, hydraulic and motor version, Ex status, and repair history. Therefore, confirm the pump nameplate, existing seal, dimensions, seal position, and available service reference before selecting a replacement for the specific unit in service.
Does Milky Oil Prove the Lower Seal Has Failed?
No. Contaminated or emulsified chamber fluid is useful diagnostic evidence, but it does not identify one failure path by itself. Therefore, inspect the relevant seals, chamber plugs, shaft condition, static sealing points, and service history before deciding where ingress occurred or which component requires replacement.
Can Upper and Lower Seals Be Interchanged?
Do not assume so. Depending on the pump configuration, the two positions may differ in geometry, materials, orientation, and exposure environment. Therefore, confirm the exact seal position, old components, mating parts, and verified replacement reference before installation or purchasing the replacement assembly.
Can I Use a Generic Torque or Oil Quantity?
No. Critical torque, oil or buffer-fluid quantity, and clearances should come from the applicable Flygt/Xylem service documentation. Other manufacturer-specific settings should follow an approved site service procedure for the actual configuration. Do not substitute generic values from another pump.
Conclusion
A Flygt 3153.181 mechanical seal replacement is safest when technicians treat “3153.181” as the beginning of identification rather than the complete spare-parts specification. Verify the exact pump, nameplate, seal position, old components, dimensions, materials, chamber condition, and replacement reference before installation.
Then follow the applicable Flygt/Xylem documentation for manufacturer-specific service data. After assembly, use commissioning observations to confirm the complete pump behaves normally. This approach keeps the article focused on seal-service decisions without pretending to replace the official overhaul, electrical, Ex, or model-specific service manual.