Mechanical Seal Failure: Causes, Symptoms & Troubleshooting Guide
Mechanical seal failure rarely begins with one damaged part. A leaking or burned seal often reflects a problem in lubrication, installation, pump conditionThermal Damage and Excessive Heat, materials, or the surrounding process. Therefore, effective troubleshooting starts by asking what changed, when leakage appeared, and what physical evidence the failed seal can still provide.
Therefore, this guide uses a symptom-to-root-cause approach. Instead of simply replacing another seal, technicians should record the leakage pattern, inspect the removed components, and check the pump and support system. In many cases, the mechanical seal is the first component to show a wider equipment problem.
Mechanical Seal Failure Is Often a Symptom, Not the Root Cause
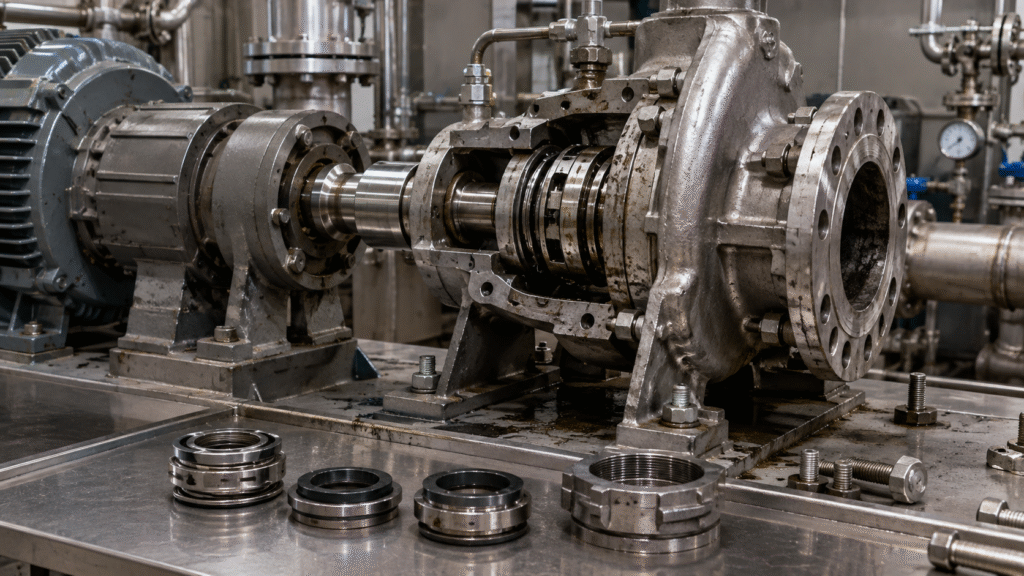
A mechanical seal depends on stable shaft motion, correct face loading, a lubricating fluid film, suitable materials, and predictable pump operation. If bearings wear, suction conditions deteriorate, or flushing stops, the seal can fail even when its original specification was correct. Therefore, replacing the seal alone may only reset the failure clock.
For example, cavitation can create unstable hydraulic forces, while misalignment can disturb face tracking. Likewise, process changes can attack elastomers or alter lubrication. Mechanical seal troubleshooting should therefore include the seal, pump, piping, process fluid, and recent operating history.
What Does Mechanical Seal Failure Look Like?
For example, common symptoms include visible leakage, an increasing leak rate, abnormal heat near the gland, face scoring, cracked or chipped rings, damaged elastomers, deposits, and repeated failures after replacement. However, no single symptom proves one root cause. Similar damage can result from different mechanical, hydraulic, thermal, or chemical conditions.
First, determine the actual leakage path. Fluid may cross the primary face interface, bypass a damaged secondary seal, leak around the stationary seat, or escape from another pump joint. Next, record whether the pump was stopped, starting, running normally, hot, or shutting down when the leak appeared.
When Does the Mechanical Seal Start Leaking?
Leak timing is one of the most useful diagnostic clues because different conditions act on the seal at different stages.
| Leak Timing | Possible Investigation |
|---|---|
| While the pump is stopped | Secondary seals, stationary seat, face damage, static pressure, incorrect assembly |
| Immediately at startup | Dry startup, trapped air, damaged faces, incorrect installation, wrong rotation or support-system sequence |
| Only while running | Runout, vibration, misalignment, cavitation, pressure changes, unstable face loading |
| After the pump becomes hot | Thermal distortion, vaporization, cooling loss, elastomer compatibility, process-temperature change |
| Intermittently | Hydraulic instability, air entry, changing tank level, vibration, crystallization, transient process conditions |
| Gradually increasing | Progressive wear, deposits, abrasion, material attack, deteriorating bearings or support conditions |
| After shutdown | Thermal soak, pressure changes, secondary-seal problems, crystallization or product solidification |
This table provides investigation directions rather than a leakage classification. The acceptable leakage level depends on seal design, fluid hazard, equipment requirements, and applicable standards. Therefore, do not diagnose a pump by a universal drops-per-minute rule.
1. Loss of Lubrication and Dry Running
First, wet-running mechanical seals rely on a thin fluid film between the faces. Poor priming, an empty seal chamber, trapped air, low tank level, suction restriction, vaporization, or an interrupted flush can weaken or remove that film. As a result, friction rises, heat builds quickly, and the faces may distort, crack, or wear.
Evidence can include heavy face wear, thermal distress, discoloration, or damaged elastomers. However, these clues can overlap with other causes. The guide on what happens when a mechanical seal runs dry explains the lubrication-loss mechanism in more detail.
2. Installation Errors
Likewise, mechanical seal failure can begin before the pump starts. Dirty faces, cut O-rings, incorrect working length, excessive or insufficient spring compression, an uneven stationary seat, gland distortion, unsuitable assembly lubricant, or incorrect cartridge procedures can all disturb the sealing interface.
If a new seal leaks immediately, preserve the parts and compare the installation against the mechanical seal installation guide. In addition, confirm dimensions and axial setting instead of repeatedly tightening components. Installation errors can create symptoms that resemble material or pump problems, so evidence from the first startup is especially valuable.
3. Shaft Runout, Misalignment and Bearing Wear
In addition, a bent shaft, worn bearings, coupling misalignment, damaged sleeve, excessive axial movement, or pipe strain can force the rotating face to move relative to the stationary face. Consequently, the running track may become uneven, the faces can open intermittently, and vibration may increase.
Do not apply one universal runout or movement tolerance to every pump. Instead, use the pump or seal manufacturer’s requirements. The shaft runout and misalignment guide explains how rotor condition affects face tracking and repeated leakage.
4. Pump Vibration and Cavitation
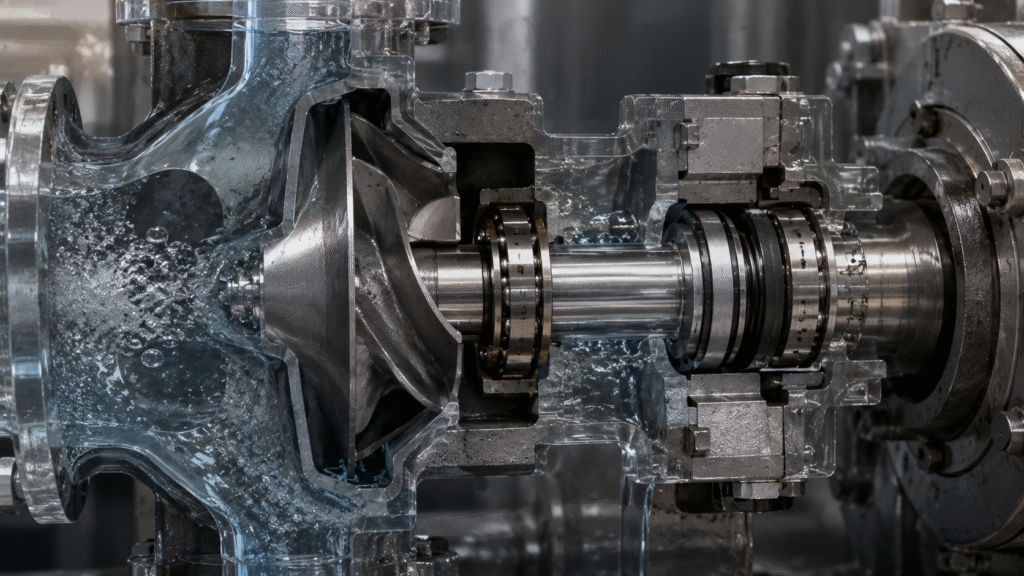
The seal may be the victim rather than the source of vibration. Poor suction, air entry, operation away from the intended range, cavitation, imbalance, loose foundations, and hydraulic instability can transmit changing loads through the impeller, shaft, and bearings.
Therefore, investigate the complete pump when leakage changes with flow, tank level, suction condition, or vibration. The pump cavitation and vibration guide covers this relationship in detail. A stronger seal cannot correct a pump that continues to operate under unstable hydraulic conditions.
5. Abrasive Wear, Solids and Deposits
For example, suspended solids, crystals, dirty flush liquid, and product deposits can enter the face interface or restrict springs and movable secondary seals. Deep scoring, grooves, a widening wear track, or heavy deposits may point toward contamination or abrasive service. However, these marks still require context.
Do not assume every abrasive application needs tungsten carbide. Silicon carbide, tungsten carbide, carbon, and other pairings behave differently with chemicals, impact, lubrication, and solids. Therefore, inspect the particle source and fluid conditions before changing face materials.
6. Chemical Attack and Material Incompatibility
Likewise, chemical problems can affect different seal components in different ways. Faces may corrode or lose surface integrity, elastomers may swell or harden, springs may corrode, and tungsten carbide binder phases can suffer chemical attack. Deposits may also form when the product reacts, crystallizes, or dries.
If process chemistry changed, copying the previous material specification may repeat the same mechanical seal failure. Therefore, identify the exact fluid, concentration, temperature, cleaning chemicals, and existing materials before approving a replacement. Chemical damage should be separated from purely abrasive or thermal damage whenever possible.
7. Thermal Damage and Excessive Heat
Heat can come from dry running, high process temperature, excessive face loading, poor cooling, vaporization, high friction, or an unsuitable face combination. Possible evidence includes thermal cracks, distorted faces, hardened elastomers, discoloration, or deposits around hot regions.
However, black material on a carbon face does not automatically prove “carbonization.” First, inspect lubrication, circulation, pressure behavior, face loading, and process temperature. Thermal evidence often shows what the seal experienced, but further investigation must identify why the temperature became excessive.
For a deeper explanation of overheating, thermal shock, and heat-related seal damage, see our mechanical seal thermal damage guide.
8. Incorrect Mechanical Seal Selection
Sometimes the replacement itself does not match the application. Wrong dimensions, working length, stationary-seat geometry, materials, arrangement, or operating capability can produce recurring leakage. In addition, selecting only by shaft diameter can overlook important differences between visually similar seals.
Check the actual pump, fluid, pressure, temperature, speed, solids, and containment requirements before ordering again. The general mechanical seal selection guide provides the full selection workflow. Failure analysis should determine whether the previous seal specification was unsuitable or whether the operating conditions changed after installation.
9. Flush and Seal Support Problems
A blocked flush, weak circulation, incorrect piping, contaminated support liquid, inadequate cooling, or a double-seal support-system problem can change the environment at the faces. Consequently, lubrication may deteriorate, heat may accumulate, or solids may collect around moving components.
Check piping against the approved seal arrangement instead of assuming every pump needs external flushing. Confirm valves, flow path, fluid cleanliness, venting, cooling, and support-system operation where applicable. Do not invent a universal flush pressure because the correct requirement depends on the seal and system design.
For more detail on flushing, cooling, buffer, and barrier arrangements, see our mechanical seal support system guide.
10. Pump and System Problems
Replacing the mechanical seal does not repair the pump. Before another installation, inspect bearings, shaft, sleeve, coupling, impeller, foundation, piping strain, suction condition, operating point, and system pressure. In addition, review any recent process, speed, valve, or fluid changes.
Repeated seal replacement without system checks can destroy useful evidence and increase downtime. Therefore, treat recurring mechanical seal failure as a reliability problem rather than a consumable-parts problem. The root cause may sit upstream, inside the rotating assembly, or in the way the pump operates.
What Can the Failed Seal Faces Tell You?
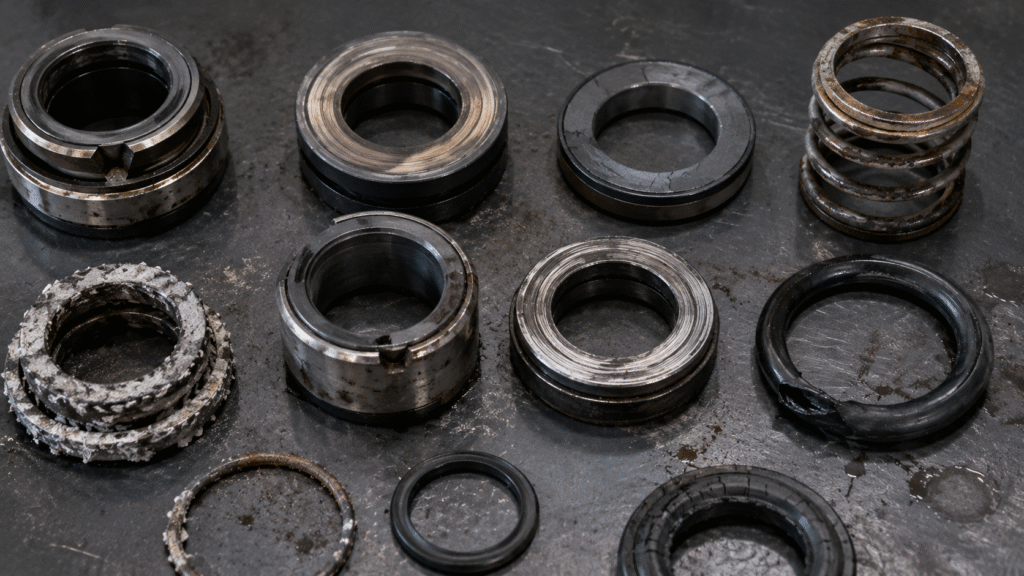
Therefore, removed components can preserve valuable clues. Record their orientation before cleaning them, photograph both faces, and inspect secondary seals, springs, sleeves, and the stationary seat. However, treat each damage pattern as evidence for investigation, not as proof of one cause.
| Face Pattern or Damage | Possible Investigation |
|---|---|
| Uneven running track | Runout, misalignment, seat squareness, gland distortion, unstable shaft motion |
| Deep scoring or grooves | Abrasive solids, contaminated flush, hard particles |
| Radial cracks | Thermal stress, rapid temperature change, face loading; investigate before concluding |
| Chipped edges | Impact, installation damage, vibration, mechanical movement |
| Swollen elastomer | Chemical incompatibility, process change |
| Hardened elastomer | Heat, aging, chemical exposure |
| Corroded spring or metal parts | Fluid compatibility, contaminated support liquid |
| Heavy deposits | Crystallization, solids, poor circulation, product drying |
Mechanical seal failure analysis works best when technicians combine several clues. A crack location, wear pattern, deposit type, leak timing, and pump history together provide much stronger evidence than one photograph alone.
A Step-by-Step Mechanical Seal Troubleshooting Process
Use a consistent sequence so the most obvious evidence does not disappear during repair:
- Record when leakage occurs and how operating conditions change.
- Locate the actual leakage path.
- Preserve and photograph the failed seal before cleaning.
- Inspect faces, elastomers, springs, and stationary components.
- Verify seal dimensions, working length, and installation.
- Check shaft condition, bearings, alignment, and movement.
- Review suction conditions, vibration, cavitation, and operating point.
- Confirm fluid chemistry and material compatibility.
- Inspect flush, cooling, barrier, or other support systems.
- Correct the root cause before installing another seal.
This process turns troubleshooting into evidence-based elimination rather than guesswork. In addition, it creates a record that helps identify patterns when the same pump fails again.
When Replacing the Mechanical Seal Will Not Solve the Problem
A replacement seal will not straighten a shaft, restore a bearing, remove pipe strain, improve suction conditions, or correct an unstable operating point. Likewise, harder faces will not repair lost lubrication, and stronger springs will not cure cavitation.
Therefore, stop repeated seal replacement when the same symptom returns. Compare the failed parts with the previous failure, inspect the pump, and review process changes. Successful troubleshooting ends when the root condition changes, not simply when a new mechanical seal is installed.
Mechanical Seal Failure FAQ
Why Does a Mechanical Seal Fail Repeatedly?
Repeated failures usually mean the underlying condition remains. Check installation, lubrication, rotor condition, vibration, pump operation, fluid compatibility, and support systems instead of assuming each replacement seal had the same manufacturing defect.
Can I Identify the Root Cause From the Seal Face Alone?
Usually not with certainty. Face patterns provide useful diagnostic clues, but installation history, leak timing, pump condition, operating data, and other damaged components help confirm the cause.
Why Does a Seal Leak Only When the Pump Runs?
Dynamic problems become more important during rotation. Investigate runout, misalignment, vibration, cavitation, pressure changes, face loading, and bearing condition. A static secondary seal problem can still exist, so verify the actual leakage path first.
Should I Replace a Failed Seal With Harder Face Materials?
Only when the actual service requires them. Hardness may improve abrasion resistance, but it cannot solve dry running, chemical incompatibility, shaft movement, poor installation, or unstable pump operation.
Mechanical seal failure should be treated as evidence, not merely as a damaged spare part. Record the leak timing, preserve the old seal, study the damage pattern, and inspect the pump and process. Finally, correct the verified root cause before installing another replacement. That approach gives maintenance teams a much stronger chance of preventing the same failure from returning.