A reliable Wilo mechanical seal replacement starts with the exact pump identity, not the Wilo name alone. “Wilo pump,” “Wilo PH,” or “Wilo centrifugal pump” usually does not identify one replacement seal. Different pump versions can use different seal constructions, dimensions, materials, or service kits. Therefore, record the complete pump data before removing or ordering any mechanical seal.
The practical workflow is simple: identify the pump, verify the existing seal, cross-check critical dimensions, then follow the service instructions for that exact model. This guide focuses on Wilo-specific identification and replacement decisions. It does not replace a complete mechanical seal installation guide, failure guide, materials guide, or pump overhaul manual.
Start With the Exact Wilo Pump Identification
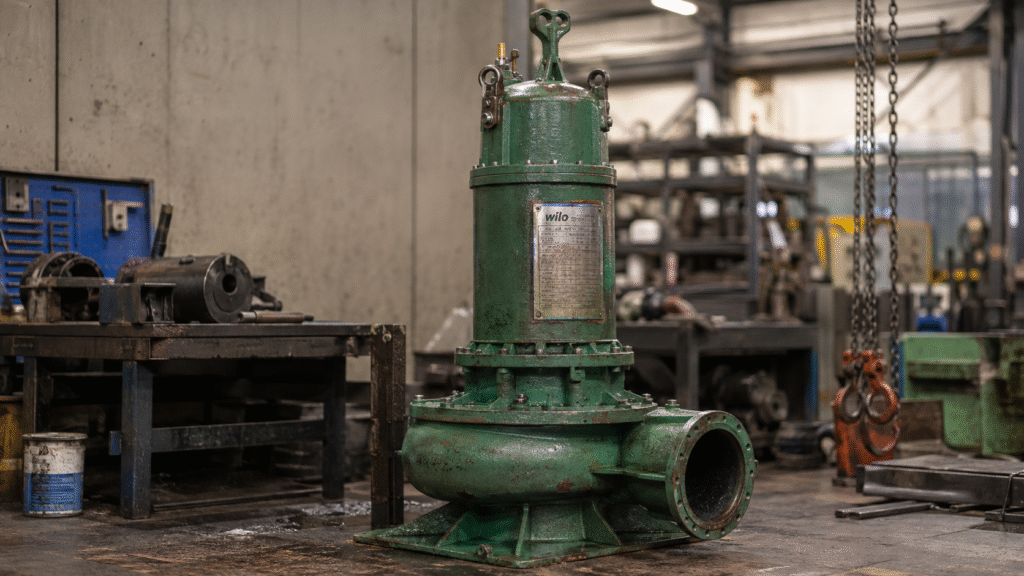
Before selecting a Wilo mechanical seal replacement, photograph the complete pump nameplate. Record the full model, Wilo article or product number, serial number, production date or code, motor rating, and speed. Also record any existing service-kit reference or mechanical-seal code shown in reliable maintenance documents.
Do not shorten the identity to a broad family name. In-line, end-suction, multistage, drainage, and sewage pumps can use different seal arrangements and different service procedures. In addition, a production revision can affect compatible spare parts even when the general pump family remains unchanged. The pump family still helps narrow the search. However, it should guide the investigation rather than finish it. Compare the nameplate with Wilo product information and the model-specific manual, then confirm the physical seal before ordering.
Why the Wilo Article Number Matters
The Wilo article number can provide a more precise starting point than a series description. Official Wilo product pages associate individual products with article numbers, technical data, documents, and, for some models, a mechanical-seal designation. Therefore, record the complete article number exactly as shown on the pump or official documentation.
An article number can also help service personnel locate the correct product version, spare-parts information, and relevant documentation. However, never invent or infer a number from a visually similar pump. Use only data from the actual nameplate, Wilo records, or reliable service documents. Serial and production information remain important because older and newer versions may not share every service component. Consequently, the strongest Wilo mechanical seal replacement identification combines article number, serial or production data, old seal construction, and current pump configuration.
Identify the Existing Mechanical Seal or Service Kit
If the original seal reference is available, record it before dismantling the pump. Also photograph the seal arrangement, spring or bellows design, stationary seat, rotating unit, orientation, face materials, and visible elastomer configuration. These details help confirm whether the installed assembly matches the expected pump configuration.
When Wilo documentation lists a service-kit or spare-part reference, check what the kit actually contains. A mechanical-seal kit can include the seal together with O-rings, washers, gaskets, shims, or other service parts. Therefore, a service kit should not automatically be described as one mechanical seal. During purchasing, state the required scope clearly: mechanical seal only, seal with associated static parts, or the complete service kit. This avoids comparing two quotations that contain different component sets.
Which Dimensions Should You Confirm?
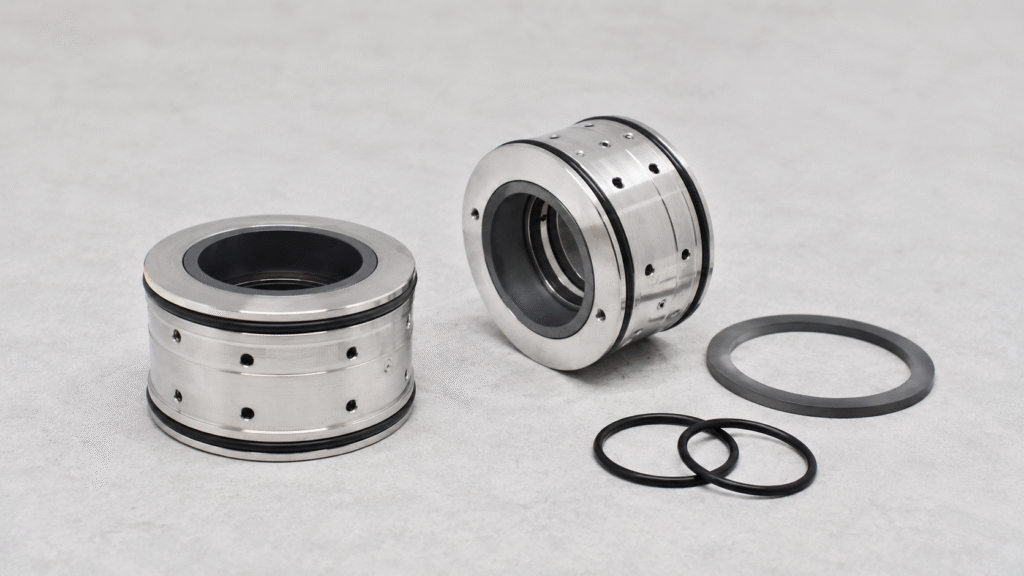
Dimensions should verify the identification, not replace it. Confirm the shaft or sleeve diameter, rotating-unit dimensions, stationary-seat dimensions, and installed working length. Where the design requires it, also check gland, cartridge, or locating dimensions that control the seal position. Two seals may share one shaft diameter yet use different seat profiles, working lengths, springs, bellows, or installation orientation. Therefore, shaft diameter alone cannot confirm a Wilo mechanical seal replacement. Appearance alone is even less reliable when old elastomers are swollen or metal parts are worn.
For a complete measuring procedure, use the How to Measure a Mechanical Seal guide. Keep the old rotating and stationary components together until the new seal has been fully verified against the pump record, application details, and approved replacement drawing.
Check Whether the Pump Has Been Modified
A pump in long-term service may no longer match its original configuration. Previous repairs can introduce an aftermarket seal, a modified shaft sleeve, a converted gland, mixed service-kit parts, or another production-version component. Therefore, an old seal that fits physically does not always prove the original factory arrangement.
Look for unexpected spacers, sleeves, machining marks, altered glands, nonstandard fasteners, or dimensions that conflict with Wilo documentation. Also review earlier maintenance records when available. These details can explain why the current seal differs from the expected spare part. When information conflicts, cross-check the article number, serial or production data, installed seal, dimensions, and actual pump assembly. Do not order from the old seal alone, and do not ignore obvious modifications simply because a catalog entry looks authoritative.
How to Verify the Replacement Seal Before Installation
For a Wilo mechanical seal replacement, place the old and new assemblies side by side before installation. Confirm the pump identification, replacement drawing, shaft diameter, stationary-seat profile, working length, face and elastomer materials, spring or bellows design, and installation orientation. Also compare every service-kit component that affects axial positioning or static sealing.
The new seal should match the required construction, not merely the overall appearance. Check whether the stationary seat enters the correct bore, whether the rotating element locates at the intended position, and whether all directional components face the correct way.
If you plan to change the original material combination, review the fluid, temperature, pressure, solids, and chemistry first. The Mechanical Seal Material Selection guide covers that decision in detail. A harder face or different elastomer is not automatically an upgrade.
General Wilo Mechanical Seal Replacement Workflow
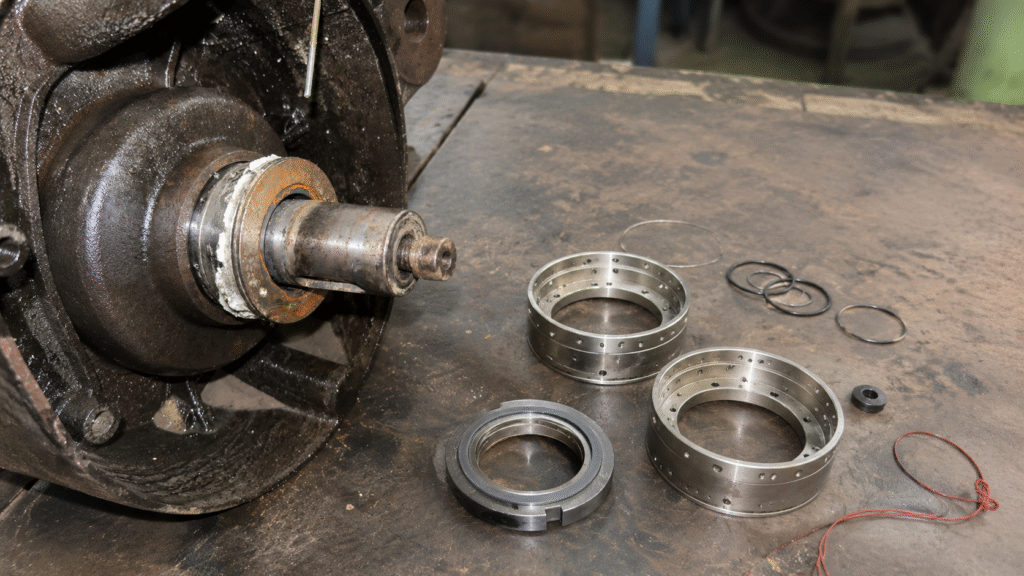
The following steps describe only a general workflow for qualified maintenance personnel during normal service work. Exact dismantling, impeller removal, torque values, clearances, lubricants, and assembly sequences must come from the service documentation for the exact Wilo pump model and version.
- Identify and isolate the exact pump. Qualified personnel should control electrical energy, pressure, temperature, and hazardous fluid according to site and manufacturer procedures.
- Record the existing assembly. Photograph the nameplate, seal position, gland or cover, spring direction, spacers, and related service parts before dismantling.
- Remove the old seal according to the model-specific Wilo instructions. Do not assume every Wilo pump opens or releases the impeller in the same way.
- Inspect the shaft, sleeve, seat bore, and bearings. Repair damage that could prevent the new seal from operating correctly.
- Compare the old and new seals. Recheck geometry, working length, materials, orientation, and kit contents.
- Install the stationary and rotating components according to the seal design. Use only a lubricant compatible with the specified elastomers and pump instructions.
- Reassemble the pump to model-specific requirements. Use the specified torque, clearances, spacers, and component sequence.
- Prime, vent, and commission according to the Wilo manual. Confirm correct rotation, liquid supply, and normal operating condition before continuous service.
For detailed handling of seal faces, O-rings, working length, and component or cartridge installation, use the Mechanical Seal Installation Guide rather than extending this Wilo article into a universal installation manual for every pump configuration and operating service condition encountered.
Component vs Cartridge and Submersible Wilo Seals
Seal construction must match the original pump arrangement. A component seal may require separate stationary and rotating parts, while a cartridge arrangement can use a preassembled unit with different locating and installation logic. Therefore, do not transfer one installation sequence to another construction without checking the specific instructions.
Submersible and sewage applications need additional caution. Selected Wilo EMU-type or other submersible pumps may use upper and lower seals, an oil chamber, or another double-seal arrangement. The upper and lower positions can have different functions, materials, and service procedures.
As a result, a dry-installed centrifugal-pump procedure should not be copied directly to a submersible pump. Confirm seal position, oil-chamber arrangement, fluid quantity or lubricant specification only from the exact Wilo model documentation. Never invent oil quantities or fill instructions.
Common Wilo Pump Seal Replacement Mistakes
One common Wilo mechanical seal replacement mistake is ordering from “Wilo,” “PH,” or another broad family name. Another is matching only the shaft diameter. Buyers may also ignore article and serial information, assume that the installed seal is still the original configuration, or treat every service kit as one mechanical seal.
Installation mistakes often begin earlier, during identification. A similar-looking stationary seat can have a different profile, and the same nominal shaft size can use another working length. In addition, changing face or elastomer materials without checking the application may introduce a new compatibility problem.
Hong Teng’s Wilo replacement mechanical seal range includes compatible replacement seals for selected Wilo applications. The 156-series replacement seal for selected PH, PB-H, HIPH, and PHI pumps is one example, but compatibility still requires confirmation against the exact pump and existing seal.
What If the New Seal Leaks Again?
Repeated leakage should trigger a root-cause check rather than another automatic seal change. Review bearing wear, shaft runout, misalignment, dry running, cavitation, solids, chemical incompatibility, and incorrect installation. A replacement seal cannot correct a damaged pump or unstable operating condition.
Keep this section short because the Mechanical Seal Failure guide covers the full troubleshooting process. The important Wilo-specific decision is whether the replacement matches the actual pump and whether the model-specific assembly procedure was followed. If leakage begins immediately after service, recheck working length, seat installation, orientation, kit components, priming, and pump assembly. However, do not invent universal Wilo clearances or torque values during troubleshooting.
Information to Send Before Ordering a Wilo Replacement Seal
For a Wilo mechanical seal replacement inquiry, send the complete pump model, article number, serial number, production date or code, motor rating, and speed. Include the existing service-kit number or mechanical-seal reference when available, plus a clear pump nameplate photo.
Also send photos of the complete old seal, rotating unit, stationary seat, spring or bellows arrangement, and relevant gland or cartridge components. Add the shaft or sleeve diameter, stationary-seat dimensions, working length, pumped fluid, operating temperature, pressure, solids, and required quantity.
Finally, state whether you need the mechanical seal only or a complete service kit. Wilo trademarks and pump model names are used only for compatibility identification. Hong Teng replacement seals are independently manufactured replacement parts unless explicitly documented otherwise by supporting supply records.
Wilo Mechanical Seal Replacement FAQ
Can I Order the Correct Part From the Pump Series Name Alone?
Usually not. A broad series name may include several sizes, revisions, shaft dimensions, or seal constructions. Record the article number, serial or production information, complete model, old seal, and critical dimensions before approving a replacement for the specific pump and production version.
Is the Article Number More Important Than Shaft Diameter?
It is usually a stronger starting point because it identifies the product more precisely than shaft diameter alone. However, final verification should still compare the existing seal, shaft diameter, stationary seat, working length, materials, and current pump configuration before ordering.
Is a Service Kit the Same as a Mechanical Seal?
Not always. Depending on the product, a kit may contain a mechanical seal plus O-rings, washers, gaskets, shims, or other service components. Confirm the documented kit contents and required purchasing scope before ordering parts for the planned maintenance work scope.
Can I Use the Same Procedure for a Submersible Pump?
Not automatically. A submersible pump may use upper and lower seals, an oil chamber, or another arrangement that differs from a dry-installed centrifugal pump. Follow the model-specific manual for the exact pump, production version, seal position, and documented service arrangement.
Conclusion
A dependable Wilo mechanical seal replacement begins with identification and ends with model-specific verification. Record the complete pump model, article number, serial and production information, existing seal, service-kit reference, and critical dimensions before selecting a replacement. Next, compare the old seal with the replacement drawing and actual pump configuration. Then follow the exact Wilo service documentation for dismantling, assembly, torque, clearance, lubricant, priming, and commissioning. This approach reduces ordering errors without turning a brand-specific replacement decision into a generic pump overhaul procedure.