A reliable Grundfos mechanical seal replacement starts with the complete pump identity, not only the series name. “Grundfos CR,” “Grundfos CM,” or even “Grundfos pump” does not identify one universal shaft seal. Different sizes, production versions, shaft dimensions, materials, and operating duties can change the required seal. Therefore, collect the pump nameplate information before comparing replacement parts.
The identification process combines the pump model, product number, production information, shaft-seal code, service-kit reference, old seal, critical dimensions, and operating duty. This article focuses on that Grundfos-specific workflow instead of repeating general seal identification, measurement, materials, or installation guidance.
Start With the Grundfos Product Number
For a Grundfos mechanical seal replacement, the product number is often a more precise starting point than the general pump family. A series such as CR or NB describes a broad product group. However, the complete product number can connect the pump to a more specific configuration in Grundfos Product Center and related service information.
Photograph the entire nameplate before removing the seal. Record the complete pump designation, product number, and production code or date when shown. Do not copy only the largest model text. In addition, keep every nameplate line visible because production revisions can affect spare-part identification.
Use Grundfos Product Center to cross-check the product number against official product information. Compare any listed shaft-seal information and spare parts with the actual machine. Therefore, use the product number as the first reference point while keeping the physical seal as an important second check.
Why the Pump Series Alone Is Not Enough
Pump families help narrow the search, but they do not finish it. Two pumps carrying the same broad family name can differ in hydraulic size, pressure version, material execution, shaft size, motor configuration, or production revision. Consequently, a seal sold simply as “for Grundfos CR” may still require further compatibility confirmation.
Shaft diameter alone is also insufficient. Two seals can share the same nominal bore yet have different rotating assemblies, stationary seats, working lengths, or drive arrangements. Likewise, a seal that looks similar in a photograph may belong to another production version. Always cross-check identification data before treating two parts as interchangeable.
Identify the Grundfos Pump Family
The pump family provides context for the likely seal construction. However, use it only after recording the complete product identity. The family tells you where to look, while the product number and existing configuration help determine what is actually installed.
CR and CRN
CR and CRN are vertical multistage pump families, but different sizes and versions can use different shaft seals. Pump size, pressure execution, wetted materials, production revision, and shaft dimensions may matter. Therefore, never assume all CR pumps use one seal. Compare the relevant product record, old seal, and replacement drawing.
CM, CH and CHI
Compact and horizontal multistage families can use different seal constructions from the CR range. In addition, older and newer versions may not share identical geometry. Record the complete CM, CH, or CHI model together with the product number, then inspect the rotating element and stationary seat before ordering.
TP, TPE, NB and NBE
Inline and end-suction families also require exact identification. A TP or NB family name does not prove one shaft-seal design across every size and production version. Therefore, use the official product record, shaft-seal code where available, and the installed seal to confirm the replacement configuration.
Wastewater and Submersible Pumps
Wastewater and submersible pumps may use different arrangements from dry-installed centrifugal pumps. Some designs can include upper and lower seals or an oil chamber between sealing positions. If two sealing positions exist, identify each one separately. Never assume the upper seal equals the lower seal simply because both came from the same pump.
Find the Existing Shaft-Seal Code
A Grundfos shaft-seal code can provide valuable identification information for the relevant pump family. Depending on the product documentation, the code may describe aspects of the seal design, face materials, secondary-seal materials, or arrangement. However, do not create one universal letter table and apply it to every Grundfos product range.
Record the entire code exactly as shown in official documentation or on reliable service records. One letter difference may matter. In addition, confirm that the code belongs to the pump version under repair rather than another regional variant, previous quotation, or alternative service configuration.
If the code and old seal agree, identification becomes stronger. If they conflict, do not choose one source automatically. Instead, continue with the product number, production information, old seal dimensions, and current pump configuration before approving the Grundfos mechanical seal replacement.
Check the Spare-Part or Service-Kit Reference
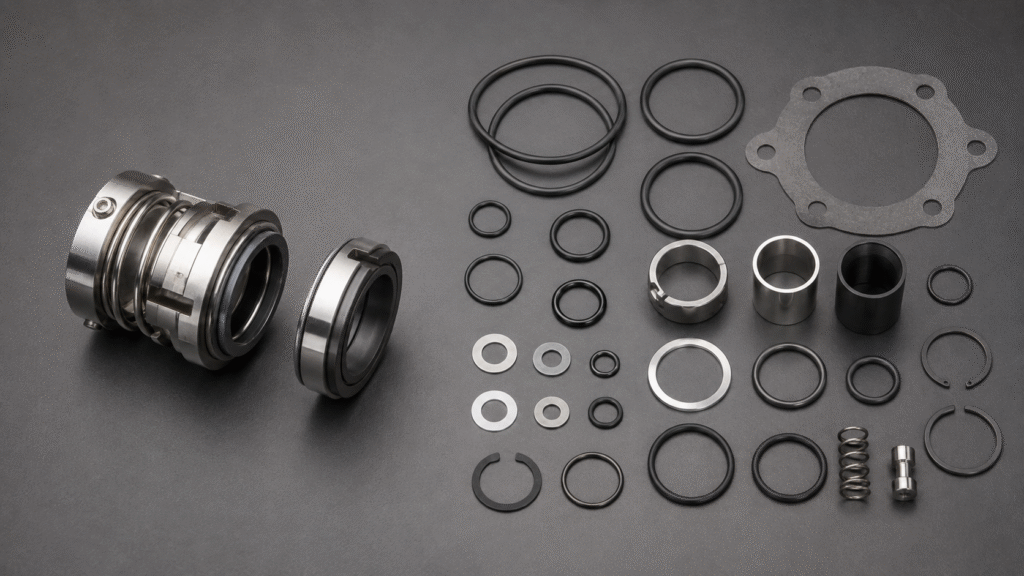
A service-kit reference is useful, but a service kit is not always identical to one mechanical seal. It may include the shaft seal plus O-rings, gaskets, washers, sleeves, or other service parts. Therefore, state whether you need only the replacement mechanical seal or the complete service kit.
Official Grundfos shaft-seal kit pages provide another cross-reference after you identify the correct pump product. Compare the kit reference with the product number and spare-parts information. However, never invent a kit number from a similar pump. For a Grundfos mechanical seal replacement, this distinction prevents purchasing confusion. One repair may need only the rotating and stationary seal components, while another needs the complete kit. Clarify the required scope before quotation.
Inspect the Mechanical Seal Currently Installed
Keep the old mechanical seal until you confirm the replacement. Photograph the complete assembly before separating its components. Next, photograph the rotating part, stationary seat, spring or drive features, O-rings, sleeves, and any gland or cartridge components that belong to the seal arrangement.
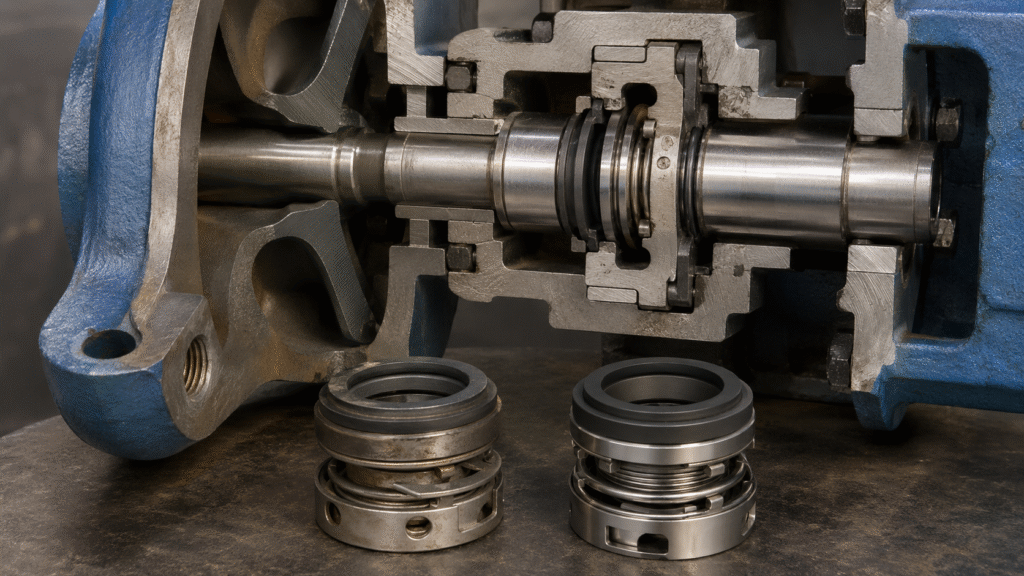
Look for construction differences rather than appearance alone. Confirm whether the seal is component-style or cartridge-style, and note any special drive, sleeve, or stationary-seat geometry. The seal construction must match the pump configuration. Use the dedicated seal-type guides for detailed construction theory.
Also record signs that previous repairs may have modified the pump. A nonstandard sleeve, converted gland, mixed hardware, or visibly altered seal chamber can explain why the installed seal does not match current documentation. Those clues become critical during compatibility checking.
Which Dimensions Should You Confirm?
Measurement is a verification step, not the first identification method. After you identify the product number and old seal, confirm the shaft or sleeve diameter, rotating seal dimensions, stationary-seat dimensions, and installed working length. Where relevant, also record gland or cartridge dimensions.
Do not select a Grundfos mechanical seal replacement from shaft diameter alone. Working length can affect face loading, while stationary-seat geometry can prevent an otherwise similar seal from fitting correctly. Use the How to Measure a Mechanical Seal guide when you need the full measurement procedure and measurement record. For worn components, note both the measured value and any likely nominal dimension. Wear, corrosion, or elastomer deformation can distort readings. Therefore, dimensions should support the identification data rather than override it without investigation.
What If the Old Seal and Grundfos Documentation Do Not Match?
A mismatch does not automatically mean the documentation is wrong or the old seal is correct. The pump may have received a previous aftermarket replacement, modified shaft sleeve, converted gland, mixed components, or an incorrect earlier repair. In addition, a production revision may have changed the original configuration.
When a conflict appears, cross-check the product number, old seal construction, measured dimensions, and current pump assembly. Also review production information and reliable service history. This helps distinguish an intentional modification from a mistaken previous repair. Do not order only from the old seal because it may already be incorrect. Likewise, do not order only from a catalog entry when previous work clearly modified the pump. The final compatibility decision should explain why the selected configuration matches the actual equipment.
Confirm Face and Elastomer Materials
After you confirm geometry, review the complete operating duty carefully. Fluid, temperature, pressure, solids, and chemical compatibility can change the required faces and secondary seals. Therefore, Grundfos mechanical seal replacement should separate geometry confirmation from material selection before final approval.
Avoid universal formulas such as clean water equals carbon/ceramic, wastewater equals SiC/SiC, hot water equals EPDM, or oil equals FKM. Those materials may become candidates in certain services, but the real operating conditions still need verification. Use the mechanical seal material selection guide for the detailed material-selection process. If the official shaft-seal code identifies a material combination, compare it with the current duty before changing it. Any proposed change should have a technical reason, especially when the pump has already operated successfully with the documented arrangement.
Common Grundfos Replacement Seal Selection Mistakes
The first Grundfos mechanical seal replacement mistake is ordering from “CR,” “CM,” or another family name alone. The second is assuming that matching shaft diameter proves compatibility. Another common error is copying a shaft-seal code incompletely, because one changed letter can point to a different configuration.
Buyers also confuse service kits with individual mechanical seals. In addition, buyers may treat an old seal as proof of the factory configuration even after years of repairs. Finally, some selections focus on harder face materials instead of confirming the pump version, geometry, and actual fluid duty first.
Hong Teng’s Grundfos replacement mechanical seal range can help narrow options after you identify the pump. The GLF-CR replacement mechanical seal and GLF-G04 16 mm replacement seal are representative examples, but each still requires final compatibility confirmation.
Information to Send Before Ordering a Grundfos Replacement Seal
For a Grundfos mechanical seal replacement, send the complete pump model, product number, production code or date, and a full nameplate photo. Include the shaft-seal code and service-kit or spare-part reference when available. These details are stronger than a general request for “a Grundfos CR pump seal.”
Also send photos of the old seal, rotating component, stationary seat, and relevant gland or cartridge parts. Add the shaft or sleeve diameter, key seal dimensions, working length, quantity, pumped fluid, temperature, pressure, solids, and unusual operating conditions.
Compatibility notice: We use Grundfos names and pump model references only to identify compatible applications. Hong Teng replacement mechanical seals are independently manufactured replacement parts. Do not describe them as original Grundfos parts unless specific documented evidence proves that status.
Grundfos Mechanical Seal Replacement FAQ
Can I Identify the Seal From “Grundfos CR” Alone?
No. CR identifies a pump family, not one universal mechanical seal. Record the complete model, product number, production information, shaft-seal code, and old seal. Then confirm the important dimensions and current pump configuration before selecting a compatible replacement part for service.
Is the Grundfos Product Number More Useful Than the Series Name?
Usually, yes. The product number provides a more precise starting point for finding the exact product record and related service information. However, still compare that information with the installed seal, production details, and current pump configuration before final approval carefully.
Is a Grundfos Service Kit the Same as a Mechanical Seal?
Not necessarily. A service kit can include a shaft seal together with O-rings, gaskets, sleeves, washers, or other service parts. Therefore, specify whether the quotation should cover only the mechanical seal, selected service parts, or the complete service kit required.
What Should I Do if the Old Seal Does Not Match the Documentation?
Do not choose either source blindly. Check the product number, production version, old seal construction, dimensions, shaft sleeve, gland, and repair history. A previous aftermarket replacement, mixed repair parts, or pump modification may explain the difference and require additional compatibility checking.
Conclusion
A dependable Grundfos mechanical seal replacement requires more than recognizing the pump family. Start with the complete model and product number, then verify production information, shaft-seal code, service-kit reference, old seal construction, dimensions, and current operating duty. The strongest identification comes from agreement between official pump information and the physical equipment. When those sources conflict, investigate the reason before ordering. Finally, confirm materials and replacement geometry, then document the selected compatible replacement for the next maintenance cycle.